Eliminating DNA Contamination in RNA Preps: A Complete Guide for Accurate Gene Expression Analysis
This article provides a comprehensive guide for researchers and drug development professionals on addressing the critical challenge of genomic DNA contamination in RNA preparations.
Eliminating DNA Contamination in RNA Preps: A Complete Guide for Accurate Gene Expression Analysis
Abstract
This article provides a comprehensive guide for researchers and drug development professionals on addressing the critical challenge of genomic DNA contamination in RNA preparations. Contaminating DNA is a pervasive issue that can lead to false-positive results in sensitive downstream applications like RT-qPCR and RNA-seq, compromising data integrity. We cover the foundational knowledge of why DNA co-purifies with RNA, explore and compare effective DNase treatment and column-based removal methodologies, offer troubleshooting and optimization strategies for difficult samples, and detail robust validation techniques to confirm complete DNA removal. By synthesizing current best practices, this guide empowers scientists to ensure their RNA samples are truly DNA-free, thereby enhancing the reliability of their transcriptomic data and its applications in biomedical and clinical research.
The Unavoidable Problem: Why Genomic DNA Plagues Your RNA Samples
The pursuit of high-quality, DNA-free RNA is a fundamental prerequisite for reliable gene expression analysis, yet it remains a significant challenge in molecular biology. Despite advances in RNA isolation technologies, contaminating genomic DNA (gDNA) persists as a common problem that can compromise the integrity of sensitive downstream applications like RT-PCR and RNA-Seq. This technical support center is built upon a critical thesis: no single RNA isolation method consistently produces RNA completely free of genomic DNA without targeted intervention [1]. The evidence demonstrates that regardless of the extraction technique employed—from organic extraction to column-based purification—some level of DNA contamination inevitably occurs, necessitating systematic detection and removal protocols. The following troubleshooting guides and FAQs are designed to help researchers navigate this inherent challenge, providing evidence-based strategies to achieve RNA preparations of sufficient purity for even the most demanding applications.
Experimental Evidence: Systematic Comparison of RNA Isolation Methods
Quantitative Evidence of DNA Contamination Across Methods
A comprehensive study evaluating RNA isolated from mouse liver tissue by five different methods demonstrated that all tested techniques resulted in detectable genomic DNA contamination, as evidenced by PCR amplification in minus-RT controls [1].
Table 1: DNA Contamination Detection Across RNA Isolation Methods [1]
| RNA Isolation Method | Example Products | DNA Contamination Detected? |
|---|---|---|
| Single-reagent extraction | TRIzol Reagent, RNA Stat-60 | Yes |
| Glass fiber filter-binding | RNeasy, RNAqueous | Yes |
| Guanidinium thiocyanate/acid phenol | Chomczynski and Sacchi procedure | Yes |
| Centrifugation through CsCl cushion | Traditional ultracentrifugation | Yes |
| Oligo d(T) selection | Poly(A)Pure, FastTrack RNA | Yes |
This foundational evidence establishes that DNA contamination is an inherent limitation across all major categories of RNA isolation methodologies, confirming the necessity of post-isolation DNA removal strategies.
Comparison of Commercial Kits for DNA Contamination
A systematic comparison of six commercial RNA isolation kits using SK-N-MC neuroblastoma cells further quantified this problem, revealing significant differences in gDNA carry-over and the effectiveness of DNase treatment [2].
Table 2: Performance Comparison of RNA Isolation Kits and DNase Treatment Efficacy [2]
| Kit Name | Methodology | A260/A280 Ratio | Yield (μg RNA/1E6 cells) | Visible gDNA Contamination Without DNase? | PCR Detection After DNase? |
|---|---|---|---|---|---|
| AxyPrep Multisource Total RNA | Spin column | 2.07 | 3.94 ± 0.41 | No | No |
| RNeasy Mini Kit | Spin column | 2.07 | 0.62 ± 0.52 | Yes | Yes |
| EasySpin | Spin column | 2.06 | 1.02 ± 0.54 | Not specified | Not specified |
| Illustra RNAspin Mini | Spin column | 2.13 | 0.09 ± 0.11 | Not specified | Not specified |
| TRIzol Plus | Phenol-based | 1.86 | 0.67 ± 0.80 | Not specified | Not specified |
| E.Z.N.A. Total RNA Kit II | Phenol-column hybrid | 1.89 | 0.16 ± 0.03 | Not specified | Not specified |
The data highlights that while some kits (particularly the AxyPrep Multisource Total RNA Miniprep) show superior performance with minimal DNA contamination, the effectiveness varies significantly between products. This underscores the importance of both initial kit selection and subsequent DNase treatment for critical applications.
Detection and Removal of Genomic DNA Contamination
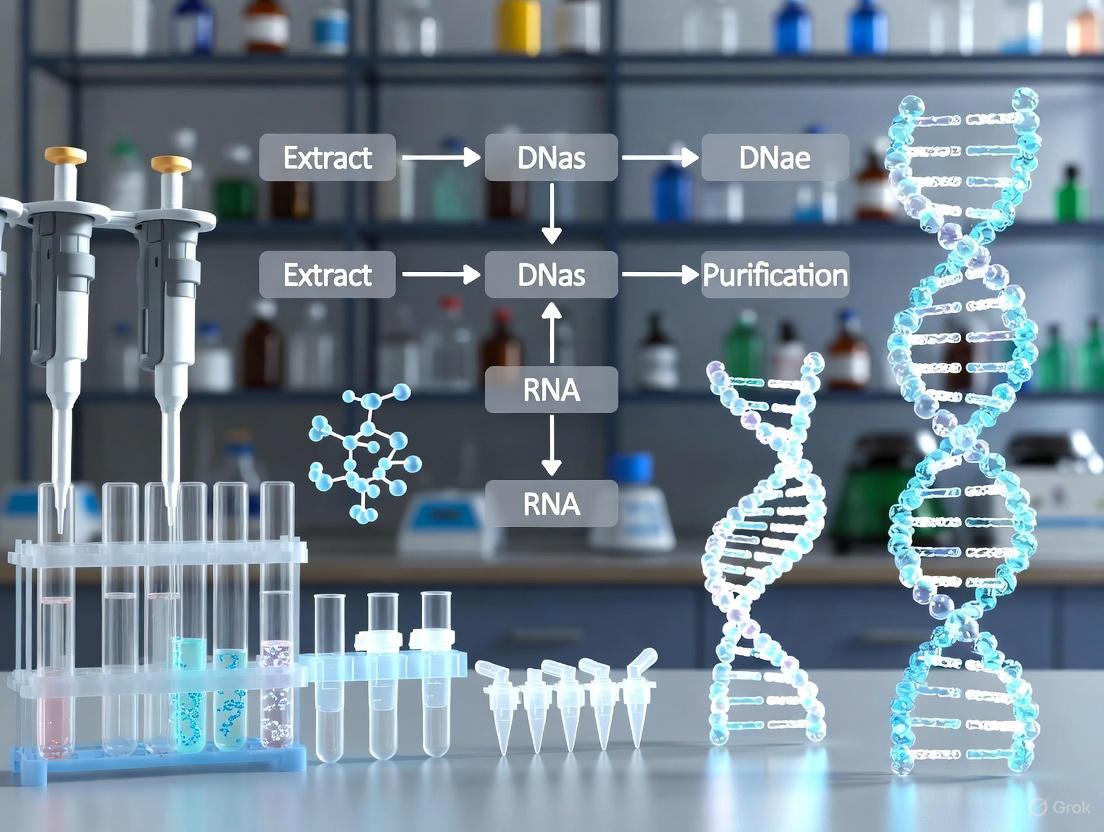
Workflow for DNA Contamination Management
The following diagram illustrates the critical decision points and procedures for ensuring DNA-free RNA preparations, from initial isolation to final verification:
Methods for Detecting DNA Contamination
Accurate detection of genomic DNA contamination is essential before proceeding with sensitive downstream applications. The following methods provide complementary approaches for identifying gDNA in RNA preparations:
Minus-RT Control PCR: The most critical control for RT-PCR experiments. Amplification of a product from an RNA sample that was not reverse transcribed indicates contamination with amplifiable DNA [1]. This control should be included for every RNA sample in an RT-PCR experiment.
Primer Design Strategy: Designing PCR primers that span intron-exon boundaries can help identify gDNA contamination, as the amplified product from contaminating DNA will include introns and be much larger than the expected cDNA product [1]. However, this approach cannot detect pseudogenes (intron-less processed genes integrated into the genome).
Spectrophotometric Analysis: While A260/A280 ratios below 2.0 can indicate DNA contamination, this method has limited sensitivity. More specialized spectrophotometric assays using fluorescent dyes specific for RNA or DNA can provide better discrimination [3].
Gel Electrophoresis and Fragment Analysis: Genomic DNA contamination can be visualized as a high molecular weight smear or band (>10 kb) on agarose gels, or as a high molecular weight "bump" on a Fragment Analyzer trace [4] [3]. These methods are particularly useful for detecting significant contamination but lack sensitivity for trace amounts.
qPCR with Genomic Targets: The most sensitive detection method, using primer pairs for housekeeping genes (e.g., GAPDH, actin, rDNA loci) that can detect trace amounts of DNA that would escape other detection methods [3]. This approach is essential for applications requiring extremely pure RNA, such as RNA-Seq.
Troubleshooting Guide: Resolving DNA Contamination Issues
FAQ: Common Scenarios and Evidence-Based Solutions
Q1: My RNA samples show good A260/A280 ratios (>2.0), but I still get amplification in my minus-RT controls. Why does this happen, and how can I resolve it?
This common scenario occurs because spectrophotometric ratios are relatively insensitive to low-level DNA contamination, while PCR can detect minute amounts of DNA [3]. The solution involves implementing a robust DNase treatment protocol:
Protocol: Add 1 μL RNase-free DNase I, 2 μL 10X reaction buffer, 6 μL DEPC-treated H₂O, and 0.5 μL RNase inhibitor to 2 μg RNA in 11 μL DEPC-treated water (total volume 20 μL) [5]. Incubate at 37°C for 15 minutes, followed by 65°C for 20 minutes to inactivate the DNase.
Alternative Solution: Use specialized DNase Treatment & Removal Reagents that include both RNase-free DNase and a unique DNase Removal Reagent that eliminates the enzyme after digestion without messy phenol extractions or risky heat inactivation procedures [1].
Q2: After DNase treatment, my RNA yields are lower. How can I minimize RNA loss during DNA removal?
RNA loss during DNase treatment and cleanup is a common problem. Consider these approaches:
Optimized Removal Reagents: Use integrated systems like the DNA-free DNase Treatment & Removal Reagents, which employ a specialized removal reagent that binds DNase and divalent cations after digestion is complete, requiring only a brief centrifugation step [1]. This avoids the RNA losses associated with phenol:chloroform extraction or additional purification columns.
Modified Protocol: If using column-based cleanups after DNase treatment, extend incubation times during elution to at least 5 minutes or perform two consecutive elutions to maximize RNA recovery [4].
Carrier Enhancement: For very small RNA quantities, add glycogen as a co-precipitant to improve yield visualization and recovery during precipitation steps [6].
Q3: I'm working with lipid-rich tissues (brain, liver) and getting persistent DNA contamination. What specialized approaches can help?
Fatty tissues present particular challenges due to their high lipid content and abundance of complex biomolecules:
Kit Selection: Choose kits specifically designed for challenging tissues. In comparative studies, the AxyPrep Multisource Total RNA Miniprep Kit successfully isolated DNA-free RNA from neuroblastoma cells without additional DNase treatment, while other kits showed persistent contamination [2].
Protocol Modification: For TRIzol-based isolations, add a high-salt precipitation step using 0.25 volumes of isopropanol plus 0.25 volumes of high-salt solution (0.8 M sodium citrate and 1.2 M NaCl) per 1 mL of TRIzol used. This effectively precipitates RNA while maintaining proteoglycans and polysaccharides in soluble form [6].
Q4: How critical is complete DNase removal after treatment, and what's the most effective removal method?
Complete DNase removal is essential because residual enzyme can degrade newly synthesized cDNA in downstream applications [1]. The optimal method depends on your application requirements:
DNase Removal Reagents: Most efficient for routine applications—fast (3 minutes), simple, and minimizes RNA loss [1].
Proteinase K/Phenol-Chloroform: Most rigorous removal but time-consuming, technically demanding, and carries risk of sample loss [1].
Heat Inactivation: Simple but risky—divalent cations in digestion buffer can cause chemically-induced RNA strand scission when heated [1].
Column Purification: Effective but adds expense and processing time [1].
The Researcher's Toolkit: Essential Reagents for DNA-Free RNA
Table 3: Key Reagents for Managing DNA Contamination in RNA Workflows
| Reagent/Category | Specific Examples | Function and Application |
|---|---|---|
| DNase Treatment Systems | DNA-free DNase Treatment & Removal Reagents [1] | Complete system for DNA digestion and enzyme removal |
| RNase-free DNase I | RQ1 RNase-free DNase [5] | Digests DNA without degrading RNA |
| Specialized RNA Kits | RNAqueous-4PCR Kit [1] | Integrated system for RT-PCR-ready RNA |
| Contamination Detection | Minus-RT controls [1] | Essential control for detecting amplifiable DNA |
| Rapid DNase Removal | DNase Removal Reagent [1] | Binds and removes DNase after treatment |
| Organic Removal | Phenol:chloroform:isoamyl alcohol [5] | Traditional protein and enzyme removal |
| Inhibition Prevention | RNase Out [5] | Protects RNA from degradation during processing |
The evidence unequivocally supports the thesis that DNA contamination is an inevitable consequence of RNA isolation, regardless of the method employed. Rather than seeking a perfect isolation technique, researchers should adopt a systematic approach that assumes contamination will occur and implements appropriate detection and removal strategies. This includes: (1) selecting isolation methods validated for your specific sample type; (2) implementing sensitive detection controls appropriate for your downstream application; (3) applying optimized DNase treatment protocols; and (4) verifying successful DNA removal before proceeding to critical experiments. By acknowledging the inevitability of DNA contamination and implementing these evidence-based practices, researchers can consistently generate DNA-free RNA suitable for even the most sensitive applications in gene expression analysis and diagnostic development.
FAQ: DNA Contamination in RNA Preparations
1. Why is genomic DNA contamination a problem in RNA-based experiments? DNA contaminating RNA preparations can serve as a template during PCR, leading to false-positive signals in sensitive downstream applications like RT-PCR and RNA-seq. This can obscure true gene expression data and result in inaccurate conclusions [1].
2. Can I rely on my RNA isolation kit to completely remove genomic DNA? No. No RNA isolation method consistently produces RNA entirely free of genomic DNA without the use of a dedicated DNase treatment step. This includes single-reagent extraction methods, glass fiber filter-binding methods, and guanidinium thiocyanate/acid phenol-chloroform extractions [1].
3. What is the best way to check for DNA contamination in my RNA sample? The most reliable method is to perform a "minus-RT" control. In this control, the RNA sample is run through the PCR protocol without the reverse transcription step. If a PCR product is generated, it was amplified from contaminating DNA, not the RNA of interest [1]. While designing primers to span intron-exon boundaries can help, it is not foolproof due to the existence of intron-less pseudogenes [1].
4. My RNA-seq data shows DNA contamination. How can I address this bioinformatically? While some alignment and counting processes may filter out reads mapping to non-genic regions, variable levels of DNA contamination can complicate differential expression analysis [7]. Specialized tools and R packages are being developed to tackle this issue. If contamination is suspected, you can:
- Re-analyze with alignment filters: Standard alignment and counting may ignore intergenic reads.
- Explore specialized tools: Investigate new software designed to estimate and correct for DNA contamination in sequencing data [7].
- Note: Overly aggressive correction can also remove genuine signals, so results should be interpreted with caution [7].
5. How does extrachromosomal circular DNA (eccDNA) differ from common genomic DNA contamination? eccDNA is a natural form of circular DNA derived from chromosomal DNA but existing independently in the nucleus [8]. Unlike random genomic DNA fragments, eccDNA is a biologically meaningful molecule involved in gene regulation, cancer progression, and other cellular functions. Its circular nature and potential to carry full genes make it a distinct entity from the linear genomic DNA fragments that typically contaminate RNA preps [9]. Standard DNase treatments may not distinguish between contaminating linear DNA and biologically relevant circular eccDNA.
Troubleshooting Guide: Preventing and Removing Genomic DNA Contamination
Problem: Persistent DNA contamination in RNA samples after standard isolation.
Solution: Implement a rigorous DNase treatment protocol followed by safe enzyme removal.
Detailed Protocol: DNase Treatment and Removal
This protocol ensures complete DNA digestion without risking RNA degradation [1].
Materials:
- RNase-free DNase I
- 10X DNase Reaction Buffer
- DNase Removal Reagent (or spin-column cleanup kit)
- RNase inhibitor (optional)
Steps:
- DNase Digestion: For a 20 µL reaction, combine 2 µg of RNA, 1 µL of RNase-free DNase I, 2 µL of 10X reaction buffer, and RNase-free water. Add 0.5 µL of RNase inhibitor for extra protection [5].
- Incubate: Incubate at 37°C for 15-30 minutes [5]. Some protocols recommend doubling the standard incubation time or enzyme units for stubborn contamination [10].
- Inactivate/Remove DNase: This is a critical step. Avoid simple heat inactivation in the presence of Mg²⁺, as it can cause RNA degradation [1]. Use one of these methods:
- Preferred - DNase Removal Reagent: Add the reagent, incubate for 2 minutes at room temperature, and centrifuge. The DNase and ions are pelleted, leaving clean RNA in the supernatant [1].
- Alternative - Spin-Column Purification: Pass the reaction mixture through an RNA clean-up column to bind the RNA and wash away the DNase [10] [4].
- Quality Control: Always perform a "minus-RT" control PCR to confirm the success of the DNA removal.
Problem: DNA contamination is discovered post-sequencing in RNA-seq data.
Solution: Assess the level of contamination and consider bioinformatic correction.
- Assessment: Use quality control tools to estimate the percentage of reads mapping to intergenic or intronic regions [7].
- Action:
- If contamination is low and uniform across samples, standard alignment and quantification with DESeq2 may be sufficient, as counting is often restricted to exonic regions [7].
- If contamination is high and variable, consider using specialized software to subtract the contamination signal. Be aware that this may reduce the power to detect differentially expressed genes [7].
- For critical experiments, the most robust solution is to repeat the experiment with a new, rigorously DNase-treated RNA sample.
The Scientist's Toolkit: Essential Reagents for DNA-Free RNA Work
The following table details key reagents for preventing and removing DNA contamination.
| Item | Function | Key Features & Considerations |
|---|---|---|
| RNase-free DNase I | Enzymatically digests contaminating DNA in RNA samples. | Must be certified RNase-free; requires Mg²⁺/Ca²⁺ for activity; sold separately or in kits [1] [10]. |
| DNase Removal Reagent | Rapidly inactivates and removes DNase after digestion. | Prevents RNA degradation; faster and safer than phenol-chloroform extraction [1]. |
| RNA Clean-up Kit (Spin Column) | Purifies RNA after DNase treatment to remove enzyme and salts. | Essential if not using a dedicated removal reagent; also removes other contaminants [10] [4]. |
| RNase Inhibitor | Protects RNA from degradation during DNase treatment. | Added to digestion reaction for extra security with valuable samples [5]. |
| "minus-RT" Control Primers | Detects DNA contamination in RNA samples. | Primers designed to span an intron can help distinguish PCR products from cDNA vs. genomic DNA [1]. |
Experimental Workflow: From Sample to Contamination-Free RNA
The diagram below illustrates the integrated workflow for obtaining high-quality, DNA-free RNA, incorporating both experimental and computational checkpoints.
Understanding eccDNA: A Specialized Source of Signal
In the context of DNA contamination, it is crucial to be aware of extrachromosomal circular DNA (eccDNA). These are circular DNA molecules derived from chromosomal DNA but physically separate from it [8]. They range in size from hundreds of base pairs to megabases and can carry entire genes, including oncogenes in cancer [11] [9].
Biogenesis and Relation to DNA Damage: A primary mechanism for eccDNA formation involves errors in DNA repair. When DNA double-strand breaks (DSBs) occur, they can be repaired by pathways like nonhomologous end joining (NHEJ) or microhomology-mediated end joining (MMEJ). If two intrachromosomal DSBs happen close together, the repair machinery can incorrectly circularize the excised fragment, creating eccDNA [11] [9]. This means that cellular stress and DNA damage, which can be common in experimental models like cancer cell lines, actively generate these molecules.
Why It Matters: Unlike random genomic contamination, eccDNA is a biologically functional entity. In RNA-seq experiments, transcripts originating from genes amplified on eccDNA (like ecDNA in cancer) are genuine biological signals and should not be filtered out as contamination [8] [9]. Distinguishing between technical DNA contamination and meaningful eccDNA-derived signals requires careful experimental design and data interpretation, often needing specialized sequencing methods like Circle-seq for definitive identification.
Troubleshooting Guides
FAQ: Addressing DNA Contamination in RNA Studies
1. How does genomic DNA (gDNA) contamination cause false positives in RT-qPCR?
gDNA contamination in RNA samples is a frequent cause of false positives in RT-PCR-based analyses. During reverse transcription and qPCR, primers can amplify contaminating gDNA sequences if they are present. This risk is significantly higher for long non-coding RNAs (lncRNAs) like MALAT1, NEAT1, and NORAD, which often lack intron-exon junctions. Without these junctions, it is impossible to design primers that distinguish the mature RNA transcript from the genomic DNA template, leading to co-amplification and false positive signals [12].
2. Why are lncRNA studies particularly vulnerable to DNA contamination?
Many well-studied lncRNAs have no introns in their sequences. A review of the literature shows that the expression levels of many lncRNAs are often evaluated by RT-qPCR without a DNase treatment step. When researchers tested this using MALAT1 as a model lncRNA, they found that results were highly affected by gDNA contamination. The inclusion of a DNase treatment step was determined to be absolutely necessary to avoid false positive results, a finding that can be extrapolated to other lncRNAs without exons [12].
3. What are the best methods for decontaminating laboratory surfaces to prevent DNA carryover?
Studies evaluating decontamination efficiency have found large differences between cleaning strategies. The most effective methods for removing contaminating DNA from surfaces like plastic, metal, and wood are sodium hypochlorite (bleach) solutions and certain commercial agents like Trigene and Virkon [13] [14]. A comparison of cleaning strategies is provided in Table 1 below.
4. How can I identify contamination in my qPCR experiments?
One of the most common ways to monitor for contamination is to use "No Template Controls" (NTCs). These wells contain all qPCR reaction components except for the DNA template. If these wells show amplification, it indicates contamination. If the contamination is from a contaminated reagent, all NTCs will show similar amplification. If the contamination is random, like from an aerosol, only some NTCs will amplify, and at different cycle threshold (Ct) values [15].
Experimental Protocols
Protocol 1: DNase Treatment of RNA Samples to Prevent gDNA False Positives
The following protocol, adapted from research on MALAT1, is essential for specific lncRNA detection [12].
- Reaction Setup: In a nuclease-free tube, combine the following:
- ≤ 200 ng/μL input RNA
- 1 μL TURBO DNase Buffer
- 0.4 U DNase I enzyme
- Incubation: Mix gently and incubate at 37°C for 20 minutes.
- Enzyme Inactivation: Add 1 μL of DNase Inactivation Reagent and incubate for 5 minutes at room temperature.
- Separation: Centrifuge the tube at 10,000 × g for 1.5 minutes. Carefully transfer the supernatant (containing the treated RNA) to a fresh, nuclease-free tube.
- Verification: To confirm complete DNA degradation, perform a PCR targeting your gene of interest (e.g., MALAT1) using the DNase-treated RNA as a template without the reverse transcription step. The absence of amplification confirms successful DNA removal.
Protocol 2: Establishing a Contamination-Minimized qPCR Workflow
Good laboratory practice is essential to avoid contamination in sensitive qPCR experiments [15].
- Physical Separation: Establish separate, dedicated areas for different stages of work:
- Pre-PCR Area: For sample preparation, reagent preparation, and qPCR setup.
- Post-PCR Area: For qPCR amplification and analysis of products.
- These areas should have dedicated equipment (pipettes, centrifuges, lab coats) and consumables. Maintain a one-way workflow from pre- to post-PCR areas.
- Use of Protective Equipment: Always wear gloves and change them frequently, especially if contamination is suspected. Use aerosol-resistant filtered pipette tips.
- Surface Decontamination: Regularly clean work surfaces and equipment in the pre-PCR area with a 10-15% fresh bleach solution (sodium hypochlorite). Allow it to sit for 10-15 minutes before wiping down with de-ionized water. Note that bleach is unstable, so fresh dilutions should be made weekly [15] [13].
- Reagent and Sample Management: Aliquot all reagents to avoid repeated freeze-thaw cycles and cross-contamination of stock solutions. Store samples separately from reagents and kits.
- Enzymatic Control (Optional): Use a master mix containing Uracil-N-glycosylase (UNG). When combined with dUTP in the PCR mix, UNG can degrade carryover contamination from previous amplification products before the thermal cycling begins [15].
The following workflow summarizes the key steps for a robust, contamination-aware qPCR experiment:
Data Presentation
Table 1: Efficiency of Cleaning Strategies for DNA Decontamination on Various Surfaces
This table summarizes data from a study that quantified the percentage of mitochondrial DNA recovered from different surfaces after cleaning with various agents, compared to a no-treatment control [13].
| Cleaning Agent | Plastic (% Recovery) | Metal (% Recovery) | Wood (% Recovery) |
|---|---|---|---|
| Cell-Free DNA | |||
| No-treatment control | 100.0 | 100.0 | 100.0 |
| Ethanol (70%) | 26.0 | 21.0 | 20.0 |
| DNA Remover | 5.8 | 2.5 | 1.5 |
| Sodium hypochlorite (0.4%) | < 0.3 | < 0.3 | < 0.3 |
| Trigene (10%) | < 0.3 | < 0.3 | < 0.3 |
| Virkon (1%) | 1.5 | 1.0 | 1.4 |
| Whole Blood (Cell-Contained DNA) | |||
| No-treatment control | 100.0 | 100.0 | 100.0 |
| Ethanol (70%) | 46.0 | 43.0 | 27.0 |
| Sodium hypochlorite (0.4%) | 1.1 | 1.4 | 0.9 |
| Virkon (1%) | < 0.8 | < 0.8 | < 0.8 |
The Scientist's Toolkit: Research Reagent Solutions
Table 2: Essential Reagents for Preventing and Managing DNA Contamination
| Item | Function/Brief Explanation |
|---|---|
| DNase I Enzyme | Enzymatically degrades contaminating genomic DNA in RNA samples prior to reverse transcription, crucial for studying intron-less lncRNAs [12]. |
| Uracil-N-glycosylase (UNG) | An enzyme included in some qPCR master mixes that degrades carryover contamination from previous PCR products (containing dUTP) before amplification begins [15]. |
| Sodium Hypochlorite (Bleach) | A potent chemical decontaminant for laboratory surfaces. Solutions with 1-2% active hypochlorite effectively destroy amplifiable DNA [13] [14]. |
| Aerosol-Resistant Filtered Tips | Prevent the accidental introduction of aerosols into pipette shafts, minimizing cross-contamination between samples during liquid handling [15]. |
| No-Template Control (NTC) | A critical quality control reaction containing all PCR components except the template RNA/DNA. Amplification in the NTC indicates contamination [15]. |
FAQs: Addressing Critical Concerns on DNA Contamination
Q1: Why is genomic DNA (gDNA) contamination a particularly critical issue for long non-coding RNA (lncRNA) research, as in the MALAT1 case study?
gDNA contamination is a critical issue because many well-studied lncRNAs, including MALAT1, NEAT1, NKILA, and NORAD, lack introns (i.e., they are mono-exonic) [16] [12]. Primers designed for their detection by RT-qPCR will inevitably bind to contaminating gDNA sequences, as there are no exon-intron junctions to target across. This leads to false-positive signals, as the PCR amplifies the gDNA contaminant alongside, or instead of, the intended cDNA target [12]. Without a DNase treatment step, results on the expression of these lncRNAs are highly unreliable [16].
Q2: What are the primary sources of gDNA contamination in RNA samples?
Contamination primarily arises during sample preparation. Key sources include:
- Co-extraction: gDNA is routinely co-extracted with RNA during standard isolation protocols [12].
- Incomplete DNase Digestion: Residual gDNA remains if a DNase treatment step is omitted or performed inefficiently [17].
- Carry-over during Library Prep: In RNA-seq, residual gDNA can be carried into sequencing libraries because reverse transcriptase can use DNA as a template, and the resulting DNA products are processed alongside cDNA [18].
- Cross-Contamination: Aerosolized DNA from other samples in the lab environment can contaminate reagents or samples during qPCR setup. This is a major concern for highly sensitive techniques [15].
Q3: How can I detect gDNA contamination in my RNA samples or sequencing data?
Several methods can be used for detection:
- No Template Controls (NTCs): In RT-qPCR, include wells containing all reaction components except the RNA template. Amplification in these wells indicates contamination of your reagents or primers with gDNA or amplicons [15].
- Spectrophotometry: While not specific for gDNA, abnormal A260/280 ratios can sometimes indicate contamination [19].
- Bioanalyzer/TapeStation: gDNA contamination can appear as a high molecular weight smear or as a distinct peak on an electrophoretogram [20].
- RNA-seq Mapping Metrics: The percentage of reads mapping to intergenic regions (IR%) is a key metric for gDNA contamination. Tools like Picard Tools, Qualimap, and the CleanUpRNAseq R package can calculate this and other diagnostic statistics [18].
Q4: My RNA-seq data is already generated and I suspect gDNA contamination. Can I correct for it computationally?
Yes, bioinformatic correction is possible. The CleanUpRNAseq R/Bioconductor package is specifically designed to identify and correct gDNA contamination in RNA-seq data [18]. It offers multiple correction methods for both unstranded and stranded data, helping to improve the accuracy of gene expression quantification and downstream differential expression analysis without the need to re-sequence samples [18].
Troubleshooting Guide: Identifying and Solving DNA Contamination
| Problem | Cause | Solution |
|---|---|---|
| False positives in RT-qPCR for mono-exonic genes/lncRNAs | Primers amplifying contaminating gDNA due to lack of exon-intron junctions [16] [12]. | Incorporate a rigorous DNase I treatment step during RNA purification (on-column or in-solution) prior to cDNA synthesis [16] [12]. |
| High molecular weight smear on RNA gel/bioanalyzer | Insufficient shearing or removal of gDNA during homogenization and purification [19] [20]. | Optimize homogenization to shear gDNA thoroughly (e.g., bead beating). Perform an off-column DNase treatment for samples rich in gDNA [19]. |
| Amplification in No Template Controls (NTCs) | Contaminated reagents (primers, water, master mix) or aerosol contamination in the lab [15]. | Aliquot reagents. Use aerosol-resistant filter tips. Physically separate pre- and post-PCR areas. Decontaminate workspaces and equipment with 10-15% bleach solution [15]. |
| High intergenic read percentage in RNA-seq | gDNA carried over and sequenced in the RNA-seq library [18] [17]. | Use CleanUpRNAseq for in-silico correction [18]. For future preps, ensure complete DNase digestion and use poly(A) selection, which is less susceptible to gDNA contamination than rRNA depletion [17]. |
Experimental Protocol: The MALAT1 Contamination Case Study
This protocol outlines the key experimental steps used to validate the effect of gDNA contamination on MALAT1 detection [12].
Objective
To quantify the false-positive signal in MALAT1 lncRNA detection caused by gDNA contamination and demonstrate the necessity of a DNase treatment step.
Materials
- Sample Types: Plasma, primary tissue samples (e.g., from NSCLC patients).
- RNA Extraction Kit: miRNeasy Serum/Plasma Advanced Kit or RNeasy Mini Kit.
- DNase I Enzyme: TURBO DNase (Ambion Life Technologies) including buffer and inactivation reagent.
- Reverse Transcription Kit: High-capacity RNA-to-cDNA kit.
- qPCR Reagents: SYBR Green master mix, specific primers for MALAT1 and a control gene (e.g., B2M).
Methodology
- Sample Collection and RNA Extraction:
- Critical Step: DNase Treatment:
- Split the extracted RNA into two aliquots: one for DNase treatment and one as an untreated control.
- Treatment Group: In a DNase-free tube, combine ≤200 ng/μL RNA, 1 μL TURBO DNase Buffer, and 0.4U DNase I enzyme. Incubate at 37°C for 20 minutes [12].
- Add 1 μL of DNase inactivation reagent, incubate for 5 minutes, and centrifuge at 10,000× g for 1.5 minutes. Carefully transfer the supernatant (purified RNA) to a new tube [12].
- cDNA Synthesis:
- Reverse transcribe the DNase-treated and untreated RNA into cDNA using the high-capacity RNA-to-cDNA kit.
- Include a negative control (no reverse transcriptase enzyme) for the untreated RNA sample to check for gDNA contamination [12].
- qPCR Amplification and Analysis:
- Perform qPCR using primers specific for the mono-exonic MALAT1 lncRNA and a control gene (e.g., B2M) that has exons and introns, allowing primers to be designed across a junction [12].
- Compare the Ct values for MALAT1 and the control gene between the DNase-treated and untreated samples.
Expected Results
- In untreated samples, MALAT1 will be detected with a low Ct value, suggesting high expression.
- In DNase-treated samples, the MALAT1 signal should be significantly reduced or eliminated, while the signal for the control gene (B2M) remains unchanged. This confirms that the initial MALAT1 signal was a false positive due to gDNA contamination [16] [12].
This table summarizes findings from a systematic study where known amounts of gDNA were spiked into RNA.
| gDNA Contamination Level | Library Prep Method | Effect on Gene Expression Quantification | Number of False DEGs |
|---|---|---|---|
| 0% (DNase Treated) | Poly(A) Selection | Minimal | Baseline |
| 0.1% | Poly(A) Selection | Minimal | Low |
| 1% | Poly(A) Selection | Altered for low-abundance transcripts | Increased |
| 10% | Poly(A) Selection | Significantly altered | High |
| 0% (DNase Treated) | Ribo-Zero (rRNA depletion) | Minimal | Baseline |
| 0.1% | Ribo-Zero (rRNA depletion) | Begins to alter profiling | Moderate |
| 1% | Ribo-Zero (rRNA depletion) | Significantly altered | High |
| 10% | Ribo-Zero (rRNA depletion) | Severely altered / Clusters with untreat. | Very High |
This table highlights the pervasiveness of contamination in public repositories.
| Data Source / Study | Type of Contamination | Prevalence / Impact |
|---|---|---|
| GTEx (V7) Dataset | Pancreas & esophagus-enriched genes (e.g., PRSS1, KRT4) in non-native tissues [21]. | ~40% of samples affected; led to numerous false eQTL assignments [21]. |
| Various RNA-seq Studies | Genomic DNA (gDNA) reads from incomplete removal [18]. | gDNA contamination levels ranged from 0.7% to 22.7% in human Ribo-Zero libraries [18]. |
| SEQC/MAQC-III Consortium | DNA contamination in reference RNA samples [18]. | Spotted in commercial reference RNA and project samples, affecting data integrity [18]. |
The Scientist's Toolkit: Essential Research Reagents & Materials
| Item | Function / Application |
|---|---|
| DNase I (RNase-free) | Enzymatically degrades contaminating genomic DNA in RNA samples. Can be used on-column during purification or in-tube after elution [22] [12]. |
| miRNeasy / RNeasy Kits | For simultaneous extraction of total RNA (including small RNAs) from serum, plasma, and tissues. Provides a clean RNA template suitable for sensitive downstream assays [12]. |
| TURBO DNase | A potent, recombinant DNase effective for removing gDNA from challenging samples. Often includes an easy-to-use inactivation reagent [12]. |
| Uracil-N-glycosylase (UNG) | An enzyme included in some qPCR master mixes to prevent carryover contamination from previous PCR amplifications by degrading uracil-containing DNA templates [15]. |
| CleanUpRNAseq R Package | A bioinformatics tool for detecting and correcting the effects of gDNA contamination in existing RNA-seq data, salvaging valuable datasets [18]. |
| Aerosol-resistant Filter Tips | Essential for preventing cross-contamination of samples and reagents during liquid handling, a key best practice in qPCR and RNA work [15]. |
FAQ: Why might my primers still amplify genomic DNA even when they span an exon-exon junction?
This occurs when a significant portion of the primer's 3' end is complementary to a sequence within a single exon of the genomic DNA. Even if the 5' end does not bind, the polymerase can still extend from the annealed 3' end, leading to a false-positive amplification product [23]. This partial annealing negates the primary advantage of using junction-spanning primers.
FAQ: What are the proven methods to completely eliminate genomic DNA contamination?
Relying solely on primer design is often insufficient. A multi-layered approach combining robust primer design with physical removal of genomic DNA is recommended. The following table summarizes the effectiveness of common decontamination methods based on experimental data:
| Method | Protocol Summary | Key Experimental Findings |
|---|---|---|
| DNase I Treatment | Treat purified RNA samples with DNase I, followed by enzyme inactivation or removal [24]. | Most effective method; treatment with TURBO DNase increased ΔCt (no-RT vs +RT) from 3.43 to 12.99, indicating near-complete DNA removal [24]. |
| Compaction Agents | Use cationic molecules (e.g., Spermidine) to selectively precipitate double-stranded DNA from an RNA solution [25]. | With 500 μM Spermidine, genomic DNA was undetectable (Ct ≥ 12.6) after 40 PCR cycles, while mRNA Ct increased by only 5 cycles, showing strong DNA-selectivity [25]. |
| Column-Based Purification | Use kits (e.g., PureLink, MagMAX) that incorporate a DNase digestion step on the purification column [24]. | Effective when integrated with on-column DNase digestion; without it, ΔCt was as low as 1.27, but digestion made DNA undetectable [24]. |
The following workflow illustrates this integrated, multi-layered defense strategy:
FAQ: How can I design better junction-spanning primers to minimize genomic amplification?
Advanced primer design tools and specific parameter tuning are critical. The limitations of early tools have been addressed by newer software that incorporates experimental validation.
The table below compares the capabilities of modern primer design tools:
| Tool Name | Key Features for Avoiding gDNA | Species Availability | Notable Advantages |
|---|---|---|---|
| ExonSurfer [26] [27] | Designs primers spanning junctions; performs genomic DNA BLAST; avoids common SNPs. | Human, Mouse, Rat, Zebrafish, A. thaliana, D. melanogaster, O. sativa | Open-source; automatically selects optimal junctions; provides end-to-end design with specificity filtering. |
| Ex-Ex Primer [23] | Generates primers from established/hypothetical junctions; parameters fine-tuned with experimental validation. | Human, Mouse, Rat | Experimentally validated; helps circumvent gDNA contamination in RT-PCR. |
| Primer-BLAST [28] | Option for "Primer must span an exon-exon junction"; checks primer specificity against a selected database. | Broad (uses NCBI databases) | Integrates Primer3 with BLAST for specificity; widely used and trusted. |
When designing primers, adhere to these experimentally-supported parameters:
- Junction Placement: Ensure the 3' end of the primer (approximately 5-10 bases) is complementary to the second exon. This minimizes the chance of stable annealing to a single exon in gDNA [23] [29].
- Primer Length: Keep primers between 18–24 nucleotides [29].
- Melting Temperature (Tm): Aim for a Tm of 60–64°C, with forward and reverse primers within 1–2°C of each other [29] [30].
- Amplicon Size: Design a short amplicon, ideally 75–150 bp. This improves PCR efficiency and makes any gDNA-derived product (which would be much larger) less likely to amplify efficiently [29] [30].
The Scientist's Toolkit: Essential Reagents for DNA-Free RNA Research
| Reagent / Kit | Primary Function | Role in Preventing gDNA Contamination |
|---|---|---|
| TURBO DNA-free Kit [24] | DNase I digestion | Highly effective for removing gDNA from purified RNA samples; includes a reagent to remove the enzyme post-digestion. |
| Cells-to-CT Kit [24] | Cell lysis & nucleic acid preparation | Integrates rapid cell lysis with on-spot DNase I digestion, eliminating the need for RNA purification. |
| PureLink / MagMAX Kits [24] | RNA purification | Column-based kits that include an optional on-column DNase digestion step for efficient gDNA removal during purification. |
| Spermidine (Compaction Agent) [25] | Selective nucleic acid precipitation | A cationic molecule that selectively precipitates double-stranded gDNA from an RNA solution, offering a nuclease-free alternative. |
| TaqMan Gene Expression Assays (*_m1) [24] | qPCR detection | Pre-designed assays where the probe spans an exon-exon junction, ensuring detection of only spliced cDNA and not gDNA. |
DNA Removal in Action: Comparing DNase Treatment and Innovative Kit Technologies
Technical Support Center
Frequently Asked Questions (FAQs)
1. How can RNA be treated to remove residual DNA? RNase-free DNase treatment of the RNA can reduce DNA to undetectable levels. A common protocol involves combining 1 µg total RNA, 1 µL 10X DNase I buffer, 1 µL Amplification Grade DNase I (1 unit/µL), and DEPC-treated water to a 10 µL reaction volume. This is incubated for 15 minutes at room temperature and inactivated by adding 1 µL of 25 mM EDTA followed by heating for 10 minutes at 65°C [31].
2. What is the difference between regular DNase I and Amplification Grade DNase I? Amplification Grade DNase I is subjected to an extra final HPLC purification step to remove traces of RNases, making it suitable for sensitive applications like RT-PCR. It is supplied at 1 unit/µL with a dedicated buffer and EDTA. Regular DNase I is supplied at a much higher concentration (5-15 mg/mL or 50-375 U/µL) and does not come with its own buffer [31].
3. Are DNase I products RNase-free? Most commercial DNase I products are guaranteed free of RNase activity. However, some versions (e.g., Cat. No. 18047-019) are not tested for RNase and are recommended primarily for protein applications. For demanding applications like RT-PCR, it is advised to use a grade specifically certified as RNase-free, such as Amplification Grade DNase I [31].
4. When can DNase treatment be omitted? DNase treatment can be considered when using RNA extraction methods that minimize gDNA carry-over (e.g., acidic phenol/chloroform extraction) or when using 3' mRNA-Seq library prep methods that rely on poly(A) stretches for priming, as these pick up less gDNA background. It may also be omitted in some targeted sequencing experiments where the genomic loci for primer binding are distant from the transcript regions [3].
5. How do I know if my RNA sample is contaminated with DNA? The most sensitive method is to run a "minus-RT" control in an RT-PCR experiment. If a PCR product is generated from an RNA sample that was not reverse transcribed, it indicates contaminating DNA. Other methods include analyzing optical density ratios (a 260/280 value below 2 can indicate DNA contamination), agarose gel electrophoresis (looking for a high molecular weight band), or using a Fragment Analyzer [1] [3].
Troubleshooting Guide
| Problem | Potential Cause | Solution |
|---|---|---|
| DNA persists after treatment | Incomplete digestion or inactivation of DNase I [1] | Ensure optimal digestion conditions (buffer, time, temperature). Use a reliable inactivation method (e.g., EDTA chelation + heat, or a DNase Removal Reagent) [31] [1]. |
| RNA degradation after treatment | RNase contamination in DNase I preparation or harsh inactivation [1] | Use certified RNase-free DNase I. Avoid heating RNA in the presence of divalent cations; instead, use EDTA to chelate Mg²⁺ before heat step or use a DNase Removal Reagent [31] [1]. |
| Poor RT-PCR/Yield | Carryover of DNase I or inactivation reagents [1] | DNase I can degrade newly synthesized cDNA. Ensure complete removal/inactivation of DNase I after the digestion step. If using EDTA, note that it can inhibit downstream enzymes; the chelation capacity may need to be saturated with additional ions [1]. |
| Low DNase I Activity | Suboptimal reaction buffer [32] | DNase I requires Mg²⁺ and Ca²⁺ for optimal activity. Ensure the reaction buffer contains these divalent cations (e.g., 2 mM MgCl₂ and 0.1 mM CaCl₂) [32]. |
| Enzyme adherence to tube walls [32] | DNase I is a "sticky" enzyme. Use RNase-free microfuge tubes for reactions to minimize activity loss [32]. |
Experimental Protocols
Standard Protocol: DNase I Treatment of RNA [31] This protocol is designed to remove up to 1 µg of DNA from an RNA sample.
- Reaction Setup: Combine the following in a nuclease-free microcentrifuge tube:
- 1 µg of total RNA
- 1 µL of 10X DNase I Reaction Buffer (e.g., 200 mM Tris-HCl (pH 8.4), 20 mM MgCl₂, 500 mM KCl)
- 1 µL of Amplification Grade DNase I (1 unit/µL)
- DEPC-treated water to a final volume of 10 µL.
- Incubation: Mix gently and incubate at room temperature for 15 minutes.
- Inactivation: Add 1 µL of 25 mM EDTA (final concentration 2.3 mM) to chelate the Mg²⁺ ions.
- Heat Inactivation: Incubate the mixture at 65°C for 10 minutes to inactivate the DNase I.
- Proceed: The treated RNA is now ready for downstream applications like RT-PCR.
Protocol for Heavily Contaminated RNA [32] For RNA with severe DNA contamination or when treating more than 10 µg of RNA.
- Dilution: Dilute the RNA sample to a concentration of approximately 100 µg/mL of nucleic acid.
- Reaction Setup: For a 25–100 µL reaction, use 2 units of DNase I per ~10 µg of RNA.
- Incubation: Incubate at 37°C for 60 minutes.
- Inactivation and Clean-up: Inactivate and remove the DNase I using a method such as the DNA-free DNase Removal Reagent, phenol:chloroform extraction, or column purification [32] [1].
The Scientist's Toolkit: Key Research Reagent Solutions
| Item | Function & Description |
|---|---|
| Amplification Grade DNase I | An endonuclease purified to be RNase-free, specifically for digesting contaminating DNA in RNA preps for sensitive downstream applications [31]. |
| 10X DNase I Reaction Buffer | An optimized buffer (typically containing Tris-HCl, MgCl₂, KCl, and sometimes CaCl₂) providing the ideal ionic conditions and pH for maximum DNase I activity [31] [32]. |
| DNase Inactivation Reagent | A unique reagent (e.g., a resin) that rapidly sequesters and removes DNase I and divalent cations after digestion, preventing RNA degradation and avoiding hazardous phenol extraction [1]. |
| EDTA (25 mM Solution) | A chelating agent used to inactivate DNase I by binding the Mg²⁺ ions essential for its enzymatic activity. It is often included in inactivation protocols [31]. |
Workflow: DNase I Treatment and Verification
The diagram below outlines the key steps and verification methods for ensuring DNA-free RNA.
Within the broader context of research on removing DNA contamination from RNA preparations, DNase I enzyme serves as a fundamental tool for ensuring accurate molecular biology results. This technical support center addresses the critical experimental challenges researchers face when implementing DNase protocols, particularly focusing on maintaining complete enzymatic activity while ensuring the enzyme preparations are free of RNase contamination. DNase I nonspecifically cleaves DNA to release 5'-phosphorylated di-, tri-, and oligonucleotide products, making it indispensable for degrading contaminating DNA after RNA isolation, preparing RNA for sensitive downstream applications like RT-PCR, and conducting specialized techniques such as DNase I footprinting to identify protein binding sequences on DNA [32]. The efficacy of these applications depends entirely on proper protocol optimization and understanding the enzyme's behavior under various experimental conditions.
Understanding DNase I: Mechanism and Applications
Biochemical Properties and Cleavage Specificity
DNase I is a 37,000 Dalton endonuclease derived from bovine pancreas that degrades double-stranded DNA to produce 3'-hydroxyl oligonucleotides [33]. The enzyme requires divalent cations for activity, and its specificity depends on which divalent cation is present. In the presence of Mg²⁺, DNase I nicks each strand of double-stranded DNA independently, generating random cleavage sites [33]. The digestion of heterogeneous double-stranded DNA typically yields dinucleotides (60%), trinucleotides (25%), and oligonucleotides, with the smallest substrate being a trinucleotide [32].
Although commonly described as nonspecific, DNase I does exhibit some sequence preference, showing sensitivity to minor groove structure and favoring cleavage of purine-pyrimidine sequences [32]. However, it cuts at all four bases in heterogeneous double-stranded DNA, with specificity for a given base typically varying no more than 3-fold [32]. The enzyme also demonstrates reduced activity on non-standard DNA structures: its specific activity for single-stranded DNA is approximately 500 times less than for double-stranded DNA, while activity on RNA-DNA hybrids is less than 1-2% of that for double-stranded DNA [32].
Research Applications
- DNA Contamination Removal: Elimination of trace to moderate amounts of genomic DNA from RNA preparations to prevent false positives in RT-PCR [32] [34]
- DNase Footprinting: Identification of protein binding sequences on DNA through protection patterns from DNase digestion [32]
- Cell Culture Applications: Prevention of cell clumping when handling cultured cells [32]
- Library Preparation: Creation of fragmented DNA sequence libraries for in vitro recombination reactions [32]
- Assay Validation: Verification that signals in DNA quantification assays specifically measure DNA rather than non-DNA components [33]
Essential Reagents and Materials
The following table summarizes key reagents required for optimized DNase experiments:
Table 1: Essential Research Reagents for DNase Protocols
| Reagent/Kit | Primary Function | Key Features | Application Examples |
|---|---|---|---|
| RNase-free DNase I | Degrades DNA contaminants in RNA samples | Certified free of RNase activity; essential for RNA work | DNA removal from RNA preps; sample clean-up prior to RT-PCR [32] [35] |
| resDetect DNase Activity Assay Kit | Quantitative DNase detection | FRET-based; rapid 30-min assay; sensitivity: 3.9×10⁻⁵ U | Detecting DNase contamination in buffers/reagents [36] |
| RNase Alert Kit | Tests for RNase contamination | Single-step 30-min assay; works with various RNases | Verifying RNase-free status of DNase preparations [35] |
| Threshold Total DNA Assay | Quantitates contaminant DNA | Validates DNA removal efficiency | Biopharmaceutical quality control; DNase qualification [33] |
| NAxtra Magnetic Nanoparticles | Nucleic acid isolation | Cost-effective; suitable for low cell inputs (down to single cells) | High-throughput NA purification from limited samples [37] |
| DNase I Buffer (10X) | Optimal enzyme activity | Contains Mg²⁺, Ca²⁺, Tris pH 7.5 | Standard digestion conditions; compatible with various samples [32] |
Optimized DNase Protocols and Methodologies
Standard DNase I Treatment for RNA Samples
This protocol is suitable for removing up to 1 µg of DNA from RNA samples in a 25-100 µL reaction volume [32]:
- Sample Preparation: Dilute RNA sample to approximately 100 µg/mL nucleic acid concentration before treatment. For severely contaminated RNA preparations (DNA >10 µg/mL), dilute to 100 µg/mL total nucleic acid concentration [32].
- Reaction Setup:
- Use 2 units of DNase I per 10 µg of RNA
- Prepare 1X DNase I Buffer from 10X stock (final concentration: 10 mM Tris pH 7.5, 2.5 mM MgCl₂, 0.5 mM CaCl₂)
- Adjust reaction volume to 25-100 µL
- For heavily contaminated samples, use 4-6 units of DNase I and extend incubation to 60 minutes [32]
- Incubation: 37°C for 30 minutes (standard) or 60 minutes (heavy contamination)
- DNase Inactivation: Several methods are available:
- DNase Removal Reagent: Add reagent, incubate, and pellet by centrifugation (most recommended) [32]
- Heat Inactivation: 75°C for 10 minutes (may cause RNA degradation in presence of divalent cations) [32]
- Phenol Extraction: Effective but risks RNA loss and residual phenol inhibition of downstream applications [32]
DNase I Qualification Protocol
Before using a new lot of DNase I for critical applications, qualify its activity using this procedure [33]:
- Stock Solution Preparation: Prepare DNase I at 2500 U/mL in storage buffer (20 mM Tris-HCl, 1 mM dithioerythritol, 50 mM NaCl, 0.1 mg/mL BSA, 50% glycerol). Aliquot and store at -20°C [33].
- Reaction Setup: Test three levels of DNase I (25, 50, and 100 units) in duplicate with appropriate controls:
- Prepare tubes with 0.5 mL Zero Calibrator with and without DNA spike (50 pg double-stranded DNA)
- Add DNase I stock (10 µL for 25 U, 20 µL for 50 U, 40 µL for 100 U)
- Add MgCl₂ to 5 mM final concentration
- Incubation and Processing:
- Incubate 3 hours at 37°C
- Heat samples at 105°C for 15 minutes, then cool on ice
- Add EDTA to chelate free Mg²⁺ ions
- Analyze denatured samples with Total DNA Assay
- Interpretation: The lowest DNase I level that reduces DNA spike by at least 90% while allowing proper filtration is the optimum concentration [33].
The following workflow diagram illustrates the key decision points in DNase experimentation:
Fluorescence-Based DNase Activity Assessment
Advanced detection methods utilize FRET-based assays for sensitive DNase activity measurement [36] [38]:
- Principle: A fluorophore-labeled DNase substrate remains non-fluorescent until cleaved by DNase activity, producing a gradually enhanced fluorescence signal proportional to enzyme concentration and activity [36].
- Procedure:
- Add 90 µL working DNase substrate solution to 96-well plate
- Add 10 µL DNase I standards or test samples
- Incubate in fluorometer collecting real-time data at 1-minute intervals for 30 minutes at 37°C
- Measure fluorescence at ex/em = 535/565 nm
- Applications: Quantitative determination of DNase I in environmental samples, biological materials, and molecular biology reagents [36].
Troubleshooting Common DNase Experimental Issues
Frequently Asked Questions
Table 2: DNase Troubleshooting Guide
| Problem | Possible Causes | Solutions | Prevention Tips |
|---|---|---|---|
| Incomplete DNA digestion | Insufficient DNase units; suboptimal buffer conditions; sample too concentrated | Qualify DNase activity; ensure Mg²⁺ and Ca²⁺ present; dilute sample to ~100 µg/mL nucleic acid | Use recommended 2 U/10 µg RNA; include cation requirements in buffer [32] |
| RNase contamination | DNase preparation contaminated with RNase | Use certified RNase-free DNase; test with RNaseAlert Kit | Verify RNase-free status before critical RNA work [35] |
| Poor downstream PCR | Residual DNase activity; incomplete inactivation | Use DNase Removal Reagent instead of heat; add EDTA to chelate cations | Avoid heat inactivation in presence of divalent cations [32] |
| High background in assays | DNase adhesion to tubes; small DNA fragments | Use recommended tube types; qualify digestion efficiency | Use RNase-free microfuge tubes; up to 50% activity loss to tube walls [32] |
| Variable activity across samples | Buffer incompatibility; inhibitory components | Increase DNase concentration for inhibitory samples; ensure consistent Mg²⁺ levels | Some proteins inhibit DNase I; may require higher units or overnight incubation [33] |
Critical Technical Considerations
Cation Requirements: Contrary to some beliefs, DNase I is not active in buffers containing Mg²⁺ yet lacking Ca²⁺. The minimal activity observed in Ca²⁺-free buffers is due to synergistic activation by contaminating Ca²⁺. EGTA addition at concentrations above Ca²⁺ levels but below Mg²⁺ levels inhibits DNase I by at least 1000-fold [32].
Ionic Strength Effects: DNase I exhibits optimal activity in buffers containing Mg²⁺ and Ca²⁺ without additional salts. When NaCl or KCl concentration increases from 0 to 30 mM, activity drops more than 2-fold [32].
Enzyme Adhesion: DNase I is a "sticky" enzyme that can adhere to container walls. In some microfuge tubes and 96-well plates, up to 50% of input DNase activity can adhere to container walls within 10 minutes. Use RNase-free microfuge tubes specifically recommended for DNase digestions [32].
Sample Compatibility: The optimal amount of DNase I must be determined for different sample types. Some proteins may inhibit DNase I activity, requiring higher enzyme concentrations or extended incubation times, potentially overnight for complete digestion [33].
Advanced Applications and Methodologies
Integration with Novel Extraction Technologies
Emerging technologies complement traditional DNase applications:
- Magnetic Nanoparticle Isolation: The NAxtra-based method enables simple, rapid, inexpensive purification of total nucleic acids, RNA, or DNA down to the single-cell level without carrier RNA. Automated processing allows handling of 96 samples within 12-18 minutes, providing a cost-effective alternative to commercial kits [37].
- High-Throughput Genome Release: Mechanical disruption methods using specialized 96-well plates and shear applicators can release genomic DNA without traditional extraction buffers, enabling rapid preparation of PCR-ready DNA from fungal spores and other challenging samples within minutes [39].
Quantitative Assessment in Pharmaceutical Applications
In biopharmaceutical settings, DNase I is used with the Total DNA Assay to:
- Validate that assay signals specifically measure DNA rather than non-DNA components
- Confirm that observed assay inhibition stems from small fragment DNA rather than protein or buffer interference [33]
These applications require rigorous DNase qualification and careful attention to reaction conditions, particularly Mg²⁺ concentrations and appropriate EDTA chelation after digestion [33].
Optimized DNase protocols balancing complete DNA degradation with preservation of RNA integrity are fundamental to successful molecular biology research. By understanding the enzyme's biochemical requirements, implementing proper qualification procedures, utilizing appropriate controls, and selecting validated reagents, researchers can effectively overcome common experimental challenges. The continued development of complementary technologies like magnetic nanoparticle extraction and high-throughput genome release further enhances our ability to work with challenging samples while maintaining the critical DNA removal capabilities that DNase I provides. Through careful attention to the technical details outlined in this support document, researchers can ensure reliable, reproducible results in their investigations of gene expression and nucleic acid biology.
Column-Based DNA Removal is a integrated purification strategy that leverages the binding properties of silica-based membranes or magnetic beads to separate RNA from other cellular components, concurrently incorporating a dedicated deoxyribonuclease (DNase) digestion step to eliminate genomic DNA (gDNA) contamination. This methodology is critical because virtually all RNA isolation methods, including single-reagent extraction and glass fiber filter-binding techniques, co-purify trace amounts of gDNA, which can lead to false-positive results in sensitive downstream applications like RT-PCR and RNA-Seq [1] [40]. The on-column treatment efficiently removes this contaminating DNA, ensuring the integrity of gene expression data, particularly for targets like long non-coding RNAs (lncRNAs) that lack intron-exon junctions and are highly susceptible to gDNA-driven false signals [40].
The workflow typically involves binding RNA to the column matrix under specific buffer conditions, performing an on-column DNase digestion to degrade DNA, washing away impurities, and finally eluting purified, DNA-free RNA. This approach minimizes sample handling and reduces the risk of RNase contamination and RNA degradation compared to in-solution digestion methods [41].
FAQs: Addressing Common Research Queries
1. Why is a dedicated DNA removal step necessary, even with specialized RNA extraction kits? No RNA isolation method consistently produces RNA completely free of genomic DNA without a DNase treatment [1]. Contaminating gDNA is a frequent cause of false positives in RT-PCR-based analyses, as it can serve as an amplification template [1] [40]. This is a particular concern for quantifying certain lncRNAs (e.g., MALAT1, NEAT1) that lack introns, making it impossible to design primers that distinguish between cDNA and gDNA templates [40]. Including a DNase treatment step is essential to avoid compromised data and erroneous conclusions.
2. What are the advantages of on-column DNase treatment versus in-solution digestion? On-column digestion offers several key benefits:
- Reduced RNA Loss and Degradation: The process occurs after the RNA is bound and protected on the column matrix, minimizing sample manipulation and contact with potential RNases [41].
- Streamlined Workflow: The DNase enzyme is simply washed away in subsequent steps, avoiding the need for additional purification methods like phenol:chloroform extraction or heat inactivation, which can be time-consuming, lead to sample loss, or damage the RNA [1].
- Effectiveness: It provides an efficient method for removing DNA while minimizing potential degradation [41].
3. My RNA samples still show DNA contamination after on-column DNase treatment. What should I do? If contamination persists, consider these troubleshooting steps:
- Verify Protocol Execution: Ensure the correct DNase I reaction buffer was used and that the incubation was performed at the proper temperature and duration (typically 15-30 minutes at room temperature or 37°C) [42] [41].
- Assess Sample Type: Tissues rich in gDNA, such as spleen, may require a more rigorous DNase treatment. For challenging samples, a second DNase treatment or a high-activity, room-temperature-stable DNase kit used in-solution after the initial purification may be necessary [20].
- Check for Inhibitors: Residual salts or guanidine from the lysis buffer can inhibit DNase activity. Ensure wash buffers contain ethanol and perform the recommended number of wash steps prior to the DNase treatment to remove these inhibitors [42] [20].
- Confirm Removal: Always include a "no-reverse transcriptase" (-RT) control in downstream RT-PCR experiments to test for the presence of contaminating DNA [41] [1].
4. How does gDNA contamination specifically impact RNA-Seq data analysis? gDNA contamination in RNA-Seq libraries can introduce significant biases:
- Altered Transcript Quantification: It can lead to inaccurate quantification of low-abundance transcripts, making them appear more expressed than they are. This inflates the background signal for non-expressed genes and can lead to false positives in differential expression analysis [43] [17].
- Disrupted Normalization: The random background of DNA-derived reads can throw off global normalization methods, affecting the entire dataset's integrity [43].
- False Discovery of Novel Elements: Contamination can lead to the misidentification of genomic sequences as novel transcribed elements, such as new long non-coding RNAs [17].
Troubleshooting Guide: Common Problems and Solutions
| Problem | Potential Cause | Recommended Solution |
|---|---|---|
| Low RNA Yield | Incomplete elution from the column. | Ensure elution buffer is applied directly to the center of the membrane to saturate it completely. Consider using a larger elution volume or a second elution [42]. |
| DNA Carryover | Insufficient DNase digestion or presence of inhibitors. | Ensure reagents are mixed thoroughly. Verify that wash steps before digestion are complete to remove inhibitors. For difficult samples, increase DNase incubation time or use a higher activity DNase [42] [20]. |
| RNA Degradation | RNase contamination during the procedure. | Use RNase-free tips, tubes, and reagents. Work quickly on a clean bench and wear gloves. Keep columns covered when not in use [42]. |
| Low A260/230 Ratio (Salt Carryover) | Residual guanidine salts or wash buffer components. | Perform additional wash steps with the provided wash buffer (containing ethanol). Ensure the column does not contact the flow-through. If reusing collection tubes, blot the rim to remove residual liquid before re-centrifugation [42] [4]. |
| Inhibition in Downstream Applications | Ethanol or salt carryover from wash buffers. | Perform a final "dry spin" of the column (empty) to remove residual ethanol before elution. Ensure the eluate does not contact the flow-through [42] [4]. |
Experimental Protocols for Validation and Correction
Protocol 1: Standard On-Column DNase Digestion
This is a generalized protocol for performing DNase treatment directly on a RNA purification column.
Materials:
Method:
- Bind RNA to the column per the manufacturer's instructions and wash as normal.
- Prepare the DNase I digestion mix on ice: Combine 10 µl of 10x DNase I Reaction Buffer, 5 µl (or 1 unit/µg RNA) of RNase-free DNase I, and 85 µl of nuclease-free water for a 100 µl total reaction volume [41].
- Apply the digestion mix directly onto the center of the silica membrane in the column.
- Incubate at room temperature (15-25°C) or 37°C for 15 minutes.
- Add wash buffer to the column and centrifuge to stop the reaction and remove the DNase enzyme.
- Proceed with the remaining wash steps and final RNA elution as directed by the kit protocol.
Protocol 2: In-Solution DNase Treatment for Stubborn Contamination
For samples with persistent gDNA contamination, a more rigorous in-solution treatment after initial RNA isolation may be required.
Materials:
- RNase-free DNase I
- 10x DNase I Reaction Buffer
- 25 mM EDTA
- Nuclease-free water
- Thermostatic water bath or heat block
Method:
- Thaw the purified RNA sample on ice.
- For up to 2 µg of RNA, combine the RNA, 2 µl of 10x DNase I Reaction Buffer, and 1 unit of DNase I per 1-2 µg of RNA. Adjust the final volume to 20 µl with nuclease-free water [41].
- Incubate the sample for 5-10 minutes at 37°C [41].
- Inactivate the DNase I by adding 2.5 µl of 25 mM EDTA and incubating for 5-10 minutes at 65-75°C [41].
- Centrifuge the sample briefly and place on ice. The RNA can now be used directly or cleaned up again using an RNA cleanup kit to remove EDTA and ions if they are suspected to inhibit downstream reactions [1].
Protocol 3: Detecting gDNA Contamination with a "-RT" Control
This control is essential for validating the success of DNA removal.
- Method:
- When setting up an RT-PCR experiment, include a control reaction for each RNA sample that contains all components except the reverse transcriptase enzyme [41] [1].
- Substitute the reverse transcriptase volume with nuclease-free water.
- Run this "-RT" control through the subsequent PCR amplification alongside your experimental samples.
- Interpretation: A PCR product in the "-RT" control indicates the presence of contaminating gDNA in your RNA sample, as the product was amplified from DNA, not cDNA. The absence of a band confirms successful DNA removal [1].
The Scientist's Toolkit: Essential Research Reagents
| Reagent / Kit | Primary Function | Key Application Notes |
|---|---|---|
| Silica Spin Columns | Binds RNA under high-salt conditions, allowing contaminants and DNA to be washed through. | The foundation of column-based purification. Modern kits often integrate DNA removal steps directly into the protocol [44]. |
| RNase-Free DNase I | Degrades both single-stranded and double-stranded DNA by hydrolyzing phosphodiester bonds. | Critical for effective DNA removal. Must be RNase-free to prevent RNA degradation. Available from suppliers like NEB and ThermoFisher [42] [1]. |
| Magnetic Bead-Based Kits (e.g., MagMAX, NAxtra) | Silica-coated magnetic beads bind RNA, enabling high-throughput automation on platforms like KingFisher. | Offer scalability, repeatability, and reduced processing time. Effective for removing interfering nucleic acids from complex samples like AAV preparations [44] [37]. |
| DNase Inactivation Reagents | Removes or inactivates DNase post-digestion without harmful heat or phenol. | A unique reagent in some kits (e.g., DNA-free) that binds DNase and cations after digestion, enabling a clean, quick inactivation by centrifugation [1]. |
| Specialized Kits with Integrated DNA Removal (e.g., RNAqueous-4PCR) | Provides a complete system from isolation to DNA removal, ensuring RNA is ready for RT-PCR. | Designed for maximum convenience and reliability, including all necessary reagents for DNA removal in a single kit [1]. |
Quantitative Impact of gDNA Contamination
Research has systematically quantified the effects of gDNA contamination on RNA-seq data, providing critical insights for data interpretation.
Table 1: Impact of gDNA Contamination on RNA-Seq Analysis (Adapted from BMC Genomics [17])
| gDNA Added to Total RNA | Library Prep Method | Effect on Gene Expression Profiling | Number of Differentially Expressed Genes (DEGs) |
|---|---|---|---|
| 0% (DNase-treated control) | Poly(A) Selection & Ribo-Zero | Baseline profile. | Baseline. |
| 0.01% - 0.1% | Poly(A) Selection | Minimal to no significant effect. | Approximately constant. |
| 0.01% - 0.1% | Ribo-Zero | Begins to affect clustering; more sensitive to contamination. | Increasing number of DEGs. |
| 1% - 10% | Poly(A) Selection | Significant fluctuations; libraries cluster separately. | Marked increase. |
| 1% - 10% | Ribo-Zero | Major disruption; profiling is highly skewed. | Large, concentration-dependent increase. |
Key Findings from the Data:
- Ribo-Zero vs. Poly(A) Selection: Ribosomal RNA depletion methods (Ribo-Zero) are significantly more sensitive to gDNA contamination than poly(A) selection methods [17].
- Low-Abundance Transcripts are Most Affected: Over 94% of genes whose measured expression was artificially correlated with gDNA contamination were low-abundance transcripts (log2 FPKM < 0) [17]. This contamination can raise false discovery rates in differential expression analysis.
- Residual DNA Post-DNase: The same study estimated that even after standard DNase treatment, total RNA can retain approximately 1.8% residual gDNA contamination [17], underscoring the need for effective removal protocols.
Technical Support Center
Troubleshooting Guide
Table 1: Common Problems and Solutions with Phenol-Free DNA Removal
| Problem | Possible Cause | Solution |
|---|---|---|
| DNA contamination persists after treatment | Insufficient DNase I activity or contact time | Increase DNase I concentration to 1 unit per 1-2 µg RNA and ensure 10-minute incubation at 37°C [41]. |
| RNA degraded after DNase treatment | RNase contamination or improper heat inactivation | Use certified RNase-free DNase I. Inactivate with 25 mM EDTA and heat at 65-75°C for 10 minutes [41]. |
| Low RNA yield after column cleanup | Inhibitor carryover from silica columns | Dilute eluted sample or use precipitation-based purification to avoid column-derived inhibitors [45]. |
| Incomplete DNA removal from surfaces | Short contact time or low temperature | For surfaces, use DNA/RNA-ExitusPlus with 10-20 minute contact time; increase temperature to 50-60°C for large contaminations [46]. |
| Skewed spectrophotometer ratios (260/230) | Chemical contaminant carryover, such as ethanol | Vent the open sample tube on the lab bench for 20 minutes and re-measure. For RNA, ensure 260/230 ratio >1.5 [4]. |
Frequently Asked Questions (FAQs)
Q1: What are the primary advantages of phenol-free DNA removal reagents?
Phenol-free reagents, such as DNA/RNA-ExitusPlus, offer significant safety and practical benefits. They are non-toxic to humans, non-corrosive to laboratory equipment, and do not produce toxic fumes. Their ready-to-use formulation, often with a color indicator, allows for easy application on workstations and equipment. Furthermore, they achieve complete DNA/RNA degradation via non-enzymatic, catalytic processes, eliminating the risk of residual contamination that can falsify PCR results [46].
Q2: How can I effectively remove DNA from an RNA sample without using phenol?
The most common and effective phenol-free method is treatment with RNase-free DNase I. A standard protocol involves incubating the RNA sample with DNase I (1 unit per 1-2 µg of RNA) in a suitable buffer (e.g., 100 mM Tris-HCl, 25 mM MgCl₂, 5 mM CaCl₂, pH 7.6) at 37°C for 5-10 minutes [41]. The DNase I can then be inactivated by adding 25 mM EDTA and heating at 65-75°C for 10 minutes [41]. Alternatively, many modern RNA isolation kits incorporate an on-column DNase digestion step, which is highly efficient and minimizes sample handling and potential RNase degradation [41].
Q3: My downstream enzymatic reactions are inhibited after a column-based cleanup. What should I do?
Research has shown that commercial silica columns can elute low levels of an unidentified substance that inhibits subsequent enzymatic reactions [45]. To resolve this, you can:
- Dilute the eluent: A higher dilution factor can reduce the concentration of the inhibitor to a level that no longer affects your enzyme [45].
- Switch purification methods: Employ an inhibitor-free precipitation-based purification method. A novel approach using chaotropic salts combined with alcohol or polyethylene glycol (PEG) can achieve simultaneous protein removal and nucleic acid precipitation, effectively avoiding this issue [45].
Q4: Is heat inactivation alone sufficient to stop DNase I activity?
While a common practice, heat inactivation alone can be risky. For critical applications, a more robust method is recommended. The most reliable protocol involves chelating the divalent cations (Mg²⁺ and Ca²⁺) that DNase I requires for activity. This is done by adding EDTA (to a final concentration of 5-20 mM) before or concurrently with the heat inactivation step (65-75°C for 10 minutes) [41]. Some researchers also use Proteinase K treatment followed by a cleanup step to degrade the DNase I completely [41].
Q5: How do I validate that DNA contamination has been successfully removed from my RNA sample?
The standard method is to perform a "no-reverse transcriptase" control (-RT control) during your RT-PCR analysis. In this control, the reverse transcriptase enzyme is omitted from the reaction mix. If a PCR product is still amplified, it indicates the presence of contaminating DNA, not the target RNA. A successful DNA removal treatment will result in no amplification in the -RT control [41].
The Scientist's Toolkit: Research Reagent Solutions
Table 2: Essential Reagents for DNA Removal from RNA Samples
| Reagent | Function | Key Characteristics |
|---|---|---|
| DNase I, RNase-free | Enzymatically degrades both single- and double-stranded DNA [41]. | The gold-standard enzyme for DNA removal; requires Mg²⁺ and Ca²⁺ for activity [41]. |
| DNA/RNA-ExitusPlus | Non-enzymatic chemical reagent that degrades DNA/RNA on surfaces and equipment [46]. | Ready-to-use spray; non-toxic, non-corrosive, and contains a color indicator [46]. |
| Chaotropic Salts (e.g., GITC, GHCl) | Enable simultaneous protein denaturation and nucleic acid precipitation in inhibitor-free protocols [45]. | Key component in novel single-step purification methods that avoid silica column inhibitors [45]. |
| EDTA (Ethylenediaminetetraacetic acid) | Chelates Mg²⁺ and Ca²⁺ ions, effectively inactivating DNase I [41]. | Critical for stopping DNase I activity after digestion without relying solely on heat [41]. |
| Proteinase K | Broad-spectrum serine protease used to digest and remove DNase I enzyme after treatment [41]. | Used as an alternative or supplement to EDTA/heat inactivation, often followed by a cleanup step [41]. |
Experimental Workflow: Phenol-Free DNA Contamination Removal
The following diagram illustrates the primary workflows for removing DNA contamination from RNA samples using innovative, phenol-free methods.
DNA Removal Method Decision Workflow
When selecting a DNA removal strategy, the optimal choice depends on the nature of your sample and the required purity. The following decision diagram guides you through the selection process.
The accuracy of downstream applications in molecular biology, such as RT-qPCR and RNA sequencing, is fundamentally dependent on the purity of the isolated RNA. A predominant challenge faced by researchers is the co-purification of genomic DNA (gDNA) with RNA, which can lead to false positive results, inaccurate gene expression quantification, and reduced assay sensitivity. The persistence of this problem stems from the chemical similarities between RNA and DNA, making complete separation technically challenging. However, the risk and degree of DNA contamination are not uniform across all sample types. The physical and biochemical properties of the starting material—be it tissue, plasma, or cell culture—significantly influence the efficiency of nucleic acid extraction and the subsequent need for specific DNA removal strategies. This guide provides sample-specific troubleshooting and protocols to address the unique challenges of DNA contamination in RNA preparations, ensuring data integrity across diverse experimental systems.
Troubleshooting Common DNA Contamination Issues
This section addresses the most frequently encountered problems related to DNA contamination in RNA workflows. The following table provides a structured guide to diagnosing and resolving these issues.
Table 1: Troubleshooting Guide for DNA Contamination in RNA Preparations
| Problem | Cause | Solution |
|---|---|---|
| Genomic DNA in RNA prep (evidenced by smearing on a gel or amplification in -RT controls) [20] | Insufficient shearing of gDNA during homogenization; carryover during phenol or silica-based preps [20]. | - Use a high-velocity bead beater or polytron rotor stator for thorough homogenization [20].- Implement a DNase treatment step (e.g., "on-column" for low-level contamination or a high-activity DNase kit for problematic samples like spleen) [20]. |
| Low A260/230 Ratios (indicating guanidine salt or organic inhibitor carryover) [47] [20] | Residual guanidine salts from TRIzol or silica preps; contaminants like humic acids or polysaccharides [20]. | - Perform additional washes with 70-80% ethanol for silica columns [20].- For TRIzol preps, wash the precipitate with ethanol to desalt [20].- Ensure the column tip does not contact the flow-through during washes [47]. |
| Low RNA Yield after DNase treatment | Overloading the purification system; incomplete homogenization; inefficient elution [47] [20]. | - Ensure complete tissue homogenization without overheating [20].- For silica columns, use the recommended elution volume. Eluting with a larger volume can increase yield [47] [20].- Do not use less elution volume than the manufacturer recommends [20]. |
| RNA Degradation | RNase activity during collection, storage, or extraction [47]. | - For tissues, freeze immediately in liquid nitrogen or use RNAlater [20].- Add beta-mercaptoethanol (BME) to the lysis buffer (10 µl of 14.3 M BME per 1 ml of buffer) [20].- Use RNase-free reagents and work in a clean, dedicated environment [47]. |
Sample-Specific Protocols and Methodologies
The optimal strategy for DNA-free RNA isolation is highly dependent on the sample origin. The following protocols are tailored to address the unique challenges posed by different biological materials.
Fresh and Archived Tissue Samples
RNA extraction from tissues is challenging due to high RNase activity and, in archived samples, cross-linking and fragmentation. A comparative study of human fetal inner ear tissue demonstrated that the choice of extraction method dramatically impacts RNA yield and quality [48].
Table 2: Comparison of RNA Extraction Methods from Tissue Samples
| Method | Sample Type | Average Yield (ng) | RNA Integrity Number (RIN) | Key Finding |
|---|---|---|---|---|
| Trizol + RNeasy Micro Kit | Fresh tissue (RNAlater) | 1424 ± 120 | 7-9 | Recommended protocol: Highest integrity RNA, suitable for NGS and RT-qPCR [48]. |
| Trizol alone | Fresh tissue (RNAlater) | 1668 ± 135 | 2-9 | High yield but variable integrity; may require cleanup [48]. |
| RecoverAll (FFPE) | Formalin-Fixed Paraffin-Embedded (FFPE) | 3.7 ± 1.0 | ~2 | Low yield and poor integrity; limitations for some downstream applications [48]. |
| High Pure FFPET | Formalin-Fixed Paraffin-Embedded (FFPE) | Not obtained | N/A | Not effective for this specific tissue type [48]. |
Recommended Workflow for Fresh Tissues:
- Homogenization: Rapidly homogenize tissue (stored in RNAlater or snap-frozen) in a guanidine-based lysis buffer containing Beta-mercaptoethanol (BME) using a high-speed homogenizer. Perform in bursts of 30-45 seconds with 30-second rests to avoid heating [20].
- RNA Extraction: Use a combined Trizol and silica column method (e.g., Trizol followed by RNeasy Micro Kit) for optimal yield and purity [48].
- DNA Removal: Perform on-column DNase I digestion during the silica column purification step. For tissues rich in gDNA (e.g., spleen), a more robust, high-activity DNase treatment after initial purification may be necessary [20].
- Quality Control: Assess RNA integrity using an Agilent Bioanalyzer (RIN > 7 is ideal for sequencing) and check for DNA contamination with a -RT control in PCR [48] [4].
Plasma and Cell-Free DNA/RNA Samples
The primary challenges with plasma samples are the very low concentration of cell-free RNA (cfRNA) and the risk of contamination by genomic DNA from lysed white blood cells. A recent 2025 study established a robust pre-analytical workflow for automatic cfDNA extraction that highlights critical factors for plasma handling [49].
Key Considerations for Plasma:
- Blood Collection Tubes: The choice of tube significantly impacts cfDNA/RNA yield and prevents gDNA contamination.
- K2EDTA Tubes: Must be processed rapidly (within 60 minutes of sampling) to prevent cell lysis and gDNA release. cfDNA yield can increase dramatically over time if plasma is not isolated promptly [49].
- Preservative Tubes (e.g., Streck, PAXgene): Allow plasma isolation up to one week after sampling while maintaining stable cfDNA yield and minimizing cellular DNA contamination [49].
- Centrifugation: Double centrifugation is critical to remove all cells and debris. The first spin isolates plasma from whole blood, and a second, high-speed spin pellets any remaining cells [49].
- Automated Extraction: Magnetic bead-based automated systems (e.g., QIAsymphony SP) are efficient for processing large numbers of plasma samples and yield high-quality, concentrated cfDNA/RNA [49].
Recommended Workflow for Plasma cfRNA:
- Blood Collection: Draw blood directly into preservative tubes (e.g., Streck) for maximum flexibility and stability. If using K2EDTA tubes, process within 60 minutes [49].
- Plasma Isolation: Perform double centrifugation per the tube manufacturer's protocol to generate cell-free plasma [49].
- Nucleic Acid Extraction: Use an automated, magnetic bead-based system to extract total nucleic acids from plasma.
- DNA Removal: Treat the extracted nucleic acids with a high-activity DNase. Since the amount of cfRNA is limited, use a DNase that can be inactivated or removed without a cleanup step that could lead to sample loss, or use a resin to remove the enzyme [20].
- Quality Control: Quantify cfRNA by fluorometry (e.g., Qubit) and assess fragment size distribution using parallel capillary electrophoresis (e.g., TapeStation) to detect potential high molecular weight gDNA contamination [49].
Cell Cultures
Cell cultures are often easier to process than tissues but can still be a source of DNA contamination if not lysed thoroughly.
Recommended Workflow for Cell Cultures:
- Lysis: Lyse cells directly in the culture dish or after pelleting using a guanidine-based lysis buffer. For tough cell walls (e.g., bacteria, yeast), incorporate enzymatic lysis (e.g., lysozyme) in addition to chemical lysis [50].
- RNA Extraction: Use a silica spin column kit designed for total RNA extraction.
- DNA Removal: Perform rigorous on-column DNase I digestion. The homogeneous nature of cell cultures typically makes on-column digestion sufficient.
- Quality Control: Check RNA purity via spectrophotometry (Nanodrop A260/280 ~1.8-2.1; A260/230 >1.5) and run an agarose gel to visualize sharp ribosomal RNA bands without a high molecular weight smear [4].
The Scientist's Toolkit: Essential Reagents for DNA-Free RNA
Table 3: Research Reagent Solutions for DNA Removal
| Item | Function | Example Use Case |
|---|---|---|
| DNase I, RNase-free | Enzymatically degrades double- and single-stranded DNA [47]. | Standard on-column or in-solution digestion during RNA purification from most sample types [47] [4]. |
| High-Activity DNase | Removes challenging gDNA contamination with high efficiency. | Ideal for samples notoriously high in gDNA, such as spleen tissue or white blood cells [20]. |
| Silica Spin Columns | Bind RNA under high-salt conditions while contaminants are washed away [50]. | The core of most modern RNA extraction kits; used for cleanup after DNase treatment or combined Trizol/column methods [48] [20]. |
| Magnetic Beads | Provide a mobile solid phase for nucleic acid binding and washing; amenable to automation [50] [49]. | Automated high-throughput extraction of RNA from plasma or cell culture samples [49]. |
| Trizol (Guanidine Thiocyanate-Phenol) | A monophasic solution that vigorously lyses cells and inactivates RNases [48] [20]. | Initial lysis and denaturation for difficult samples like tissues; often followed by a column cleanup [48]. |
| Inhibitor Removal Technology | Specialized resins or washes to remove contaminants like humic acids or polysaccharides [20]. | Cleaning up RNA from environmental or soil samples that inhibit downstream enzymes. |
| Beta-Mercaptoethanol (BME) | A reducing agent that denatures proteins and inactivates RNases [20]. | Added to lysis buffers for tissue samples to ensure RNase inhibition during homogenization [20]. |
FAQs on DNA Contamination in RNA Workflows
Q1: My RNA looks pure by Nanodrop, but my -RT PCR controls still show amplification. What is wrong? This is a classic sign of gDNA contamination. Spectrophotometry measures nucleic acid concentration but cannot distinguish between RNA and DNA. The solution is to treat your RNA sample with DNase I. If you have already done an on-column DNase digestion, consider a more robust in-solution treatment with a high-activity DNase, especially if your source material is gDNA-rich [20].
Q2: How can I effectively remove DNA from RNA without damaging the RNA? DNase I is the gold standard. It works in mild buffers and can be used directly on silica columns. After digestion, the enzyme is easily inactivated by heat (often with EDTA) or removed by a simple cleanup step. Using a dedicated DNase removal resin is also an effective option that avoids heat denaturation steps [20]. Always include a chelating agent like EDTA after digestion to prevent metal-ion catalyzed degradation [4].
Q3: My 260/230 ratio is low after RNA cleanup. What does this mean, and how can I fix it? A low 260/230 ratio indicates carryover of organic compounds or salts (e.g., guanidine from lysis buffers or ethanol from washes) [47] [20]. This can inhibit downstream enzymes like reverse transcriptase. To resolve this, perform additional wash steps with 80% ethanol during a column-based cleanup. If the sample is already purified, a simple ethanol precipitation can help to desalt it [20]. Also, ensure the column is given a brief "dry spin" after washing to remove residual ethanol before elution [4].
Q4: For RNA-seq on prokaryotic or archaeal samples, how is DNA contamination handled differently? Since prokaryotic and archaeal RNA lacks poly-A tails, poly-T-based purification cannot be used, making DNA removal more critical. The standard is DNase treatment. Furthermore, for RNA-seq, a key step is ribosomal RNA (rRNA) depletion to enrich for mRNA. This is often achieved using probe-based methods (biotinylated probes with streptavidin bead pull-down) or enzymatic digestion with RNase H. It is crucial to use probes designed specifically for your organism, as bacterial probes may not work for archaea due to sequence divergence [51].
The following diagram summarizes the core decision-making process for selecting the appropriate DNA removal strategy based on your sample type.
In molecular research, particularly in sensitive downstream applications like quantitative reverse transcription PCR (qRT-PCR), RNA sequencing, and microarray analysis, the purity of isolated RNA is paramount. A predominant challenge in this workflow is the persistent co-purification of genomic DNA (gDNA), which can lead to false positive results, inaccurate gene expression quantification, and high background noise [2]. The efficacy of DNA removal varies significantly among commercial RNA isolation kits, making the choice of workflow a critical experimental design decision. This technical resource center is framed within a broader thesis on removing DNA contamination from RNA preparations. It provides a detailed, comparative examination of three prominent kits—RNeasy (Qiagen), RNAqueous (Ambion), and GenElute (Sigma-Aldustch)—to assist researchers, scientists, and drug development professionals in selecting and optimizing their RNA purification protocols.
The following table summarizes the core technologies, typical yields, and key characteristics of the three kits based on published comparisons and manufacturer specifications.
Table 1: Commercial RNA Isolation Kit Overview and Performance Data
| Kit Name | Core Technology | Reported RNA Yield & Quality | Key Features | gDNA Removal |
|---|---|---|---|---|
| RNeasy | Silica-membrane spin column [52] | From SK-N-MC cells: Yield: 0.62 ± 0.52 µg/1E6 cells; A260/A280: ~2.07 [2]. From microdissected tissue: Median RIN 7.2 [53]. | Integrated gDNA Eliminator Solution [52]. Suitable for all tissue types, including difficult-to-lyse fatty/fibrous tissues [52]. | Effective, but some DNA contamination may remain without DNase treatment [2]. |
| RNAqueous | Filter-based, non-phenol [54] | From microdissected tissue: Median RIN 6.3; 3 out of 12 samples failed isolation [53]. | Does not require phenol, chloroform, or other toxic organic chemicals [54]. Includes a DNase treatment step [55]. | Includes a DNase treatment step to minimize genomic DNA contamination [55]. |
| GenElute | (Based on similar silica-based technology) | See Table 2 for direct comparative data. | (Assumed to be a silica-column based method) | See Table 2 for direct comparative data. |
A direct, quantitative comparison of these kits in a single study is not available in the search results. However, a separate study compared several kits, including RNeasy and RNAqueous, against other leading products, providing insight into their relative performance regarding RNA quality and DNA contamination.
Table 2: Direct Kit Comparison from Published Studies
| Kit Name | Performance in Peer-Reviewed Studies |
|---|---|
| RNeasy | Performance in LCM Prostate Tissue: Generated the highest quality RNA (median RIN 7.2) compared to RNAqueous (median RIN 6.3) and other kits. RNA quality from microdissected samples was comparable to that from whole tissue slices [53]. gDNA Contamination: While effective, RNA extracted with the RNeasy Mini Kit showed detectable genomic DNA contamination after PCR amplification, even after DNase treatment [2]. |
| RNAqueous | Performance in LCM Prostate Tissue: Showed lower median RIN (6.3) and a higher failure rate (3 out of 12 samples failed) in microdissected prostate tissue compared to RNeasy [53]. |
| AxyPrep | Performance vs. RNeasy: In a study on SK-N-MC cells, the AxyPrep Multisource Total RNA Miniprep kit provided a 4-fold higher RNA yield than RNeasy and showed no detectable genomic DNA contamination even without DNase treatment [2]. |
Troubleshooting Guide: Addressing Common RNA Workflow Issues
This section addresses specific issues users might encounter during their experiments.
Table 3: Troubleshooting Common Problems in RNA Isolation
| Problem | Possible Cause | Recommended Solution |
|---|---|---|
| Low RNA Yield | Reagents added incorrectly or insufficient mixing [56]. | Check protocol for correct buffer reconstitution and order of addition. Ensure ethanol is thoroughly mixed with the sample and binding buffer [56]. |
| Incomplete homogenization or over-drying of pellet [55]. | Optimize homogenization conditions. For pellets, control ethanol drying time and extend dissolution time or heat at 55–60°C for 2–3 minutes [55]. | |
| High degree of RNA secondary structure (esp. for < 45 nt RNAs) [56]. | Dilute your sample with 2 volumes of ethanol instead of one volume during the binding step [56]. | |
| RNA Degradation | RNase contamination [56] [55]. | Work on a clean bench, wear gloves, and use RNase-free tips and tubes. Ensure all reagents and equipment are RNase-free [56] [55]. |
| Improper sample storage or repeated freeze-thaw cycles [56] [55]. | Use fresh or properly frozen samples (-70°C). Store samples in separate packages to avoid repeated freezing and thawing [55]. | |
| gDNA Contamination | High sample input or inefficient DNA removal of the kit [55] [2]. | Reduce the starting sample volume. Use kits with integrated gDNA removal filters or perform on-column DNase digestion [52] [55]. |
| Incomplete DNase digestion or reagent carryover. | Use reverse transcription reagents with a genomic DNA removal step. Design trans-intron primers to avoid genomic DNA amplification [55]. | |
| Low A260/230 or A260/280 Ratios (Low Purity) | Residual salt or guanidine carryover [56]. | Ensure wash steps are performed completely. Avoid contact between the column tip and the flow-through. Re-centrifuge if unsure [56]. |
| Protein, polysaccharide, or fat contamination [55]. | Decrease the sample starting volume. Increase the number of 75% ethanol rinses. Avoid shaking the pellet vigorously during washes [55]. |
Frequently Asked Questions (FAQs)
Q1: How can I accurately check the purity of my isolated RNA? The purity of RNA can be evaluated by measuring the absorbance ratios A260/A280 and A260/A230 using a spectrophotometer. An A260/A280 ratio of ~2.0 and an A260/A230 ratio greater than 1.8 are generally indicative of pure RNA. For an accurate reading, it is recommended to take measurements in a buffered solution such as 10 mM Tris-Cl, pH 7.5, as the pH of pure water can greatly influence the ratio [52].
Q2: My RNA is not dissolving properly after precipitation. What should I do? Incomplete solubilization can result from over-drying the pellet, excessive product, or impurities. Control the drying time after the ethanol wash. You can prolong the dissolution time in RNase-free water or briefly heat the sample at 55–60°C for 2–3 minutes. If necessary, increase the volume of elution water [55].
Q3: For downstream applications highly sensitive to DNA, which kit is most recommended? While most kits require an optional DNase step for complete DNA removal, independent studies have shown that some kits, like the AxyPrep Multisource Total RNA Miniprep, can isolate RNA with no detectable genomic DNA contamination even without DNase treatment [2]. If using the RNeasy kit, ensure the protocol includes the dedicated gDNA Eliminator Solution or a DNase digestion step [52] [2].
Q4: What is the best way to handle small or difficult-to-lyse tissue samples? For very small samples, ensure you proportionally reduce the volume of lysis reagent (e.g., TRIzol) to prevent excessive dilution of the RNA, which can hinder precipitation [55]. For difficult-to-lyse tissues like fatty, fibrous, or skin tissue, kits that use a combination of QIAzol Lysis Reagent (a phenol/guanidine thiocyanate solution) and silica-membrane technology, such as the RNeasy Plus Universal Kit, are specifically optimized for complete lysis and high RNA yields [52].
Essential Workflow and Reagent Toolkit
RNA Isolation and DNA Removal Workflow
The following diagram illustrates the general workflow for RNA isolation highlighting the critical points for genomic DNA removal, a key differentiator among the kits discussed.
The Scientist's Toolkit: Key Research Reagent Solutions
Table 4: Essential Reagents and Materials for RNA Workflows
| Item | Function |
|---|---|
| RNase-free Water | Used for eluting RNA from the column. Must be nuclease-free to prevent degradation of the purified RNA [56]. |
| DNase I, RNase-free | Enzyme used to digest contaminating genomic DNA during the purification process. Essential for applications highly sensitive to DNA [56] [2]. |
| gDNA Eliminator Solution | A specific solution used in kits like RNeasy Plus to remove genomic DNA during the initial phase separation, prior to RNA binding [52]. |
| QIAzol Lysis Reagent | A monophasic solution of phenol and guanidine thiocyanate used for efficient lysis of all kinds of tissues, including difficult-to-lyse types, and to inhibit RNases [52]. |
| RNA Cleanup Binding Buffer & Ethanol | Used to create optimal conditions for the binding of RNA to the silica membrane in spin columns [56]. |
| RNAlater Stabilization Solution | Solution used to stabilize and protect RNA in fresh tissues or cells immediately after collection, allowing storage or shipment without degradation [54]. |
Beyond the Basics: Solving Common DNase Problems and Optimizing for Tough Samples
Core Concepts: Why Pre-Purification is Non-Negotiable
What is enzymatic inhibition in the context of nucleic acid purification?
Enzymatic inhibition occurs when substances in your sample interfere with the enzymes used in downstream molecular biology applications. For RNA work, this primarily affects enzymes like DNase (used to remove genomic DNA contamination) and reverse transcriptase (used for cDNA synthesis). These inhibitors are particularly problematic in samples from soil, plants, tissues rich in RNases (like pancreas and spleen), and clinical specimens [57] [58].
Why is pre-purification especially critical for removing DNA from RNA preparations?
Inhibitor-rich samples contain substances such as humic acids, polyphenolic compounds, salts, and other "well-known, yet poorly understood compounds" that can bind to or deactivate enzymes [57]. When these contaminants are present, DNase enzymes cannot function effectively, leaving residual genomic DNA in your RNA prep. This contamination can lead to:
- False positives in RT-PCR and qPCR
- Inaccurate transcript quantification in RNA-seq
- Compromised data quality and misinterpreted results [57]
The traditional approach of simply adding more enzyme often fails because inhibitors remain active. As one study noted, "enzymatic treatments are often performed before purification procedures are complete, which we have identified here as a major problem when seeking efficient genomic DNA removal from RNA extracts" [57].
Troubleshooting Common DNase Failure Scenarios
| Problem Scenario | Root Cause | Recommended Solution |
|---|---|---|
| Incomplete DNA digestion in soil/plant RNA | Humic acids inhibiting DNase activity [57] | Implement pre-digestion purification; test different purification kits [57] |
| Variable DNA removal across sample replicates | Co-purified inhibitors causing non-uniform DNase activity [57] | Increase purification stringency; avoid analyzing only "representative samples" [57] |
| Poor RT-PCR efficiency after DNase treatment | Carryover inhibitors affecting reverse transcriptase [57] | Add post-DNase purification; use inhibitor-resistant enzymes |
| Failed DNase digestion in RNA-rich tissues | Endogenous RNases degrading RNA before DNase can work [58] | Include RNase inhibitors during cell lysis; use specialized resuspension buffers [58] |
Best Practice Protocols for Inhibitor-Rich Samples
Standardized Pre-Purification Workflow for DNA Removal
The following workflow was optimized for inhibitor-rich environmental samples but applies to any challenging sample type [57]:
- Initial Extraction: Use phenol-chloroform extraction or specialized kits designed for your sample type
- Pre-DNase Purification: Apply dedicated purification before any enzymatic treatment
- Compare different purification kits for your specific sample
- Consider modular approaches where you can optimize individual steps
- DNase Digestion: Perform digestion with purified nucleic acids
- Post-DNase Purification: Remove enzyme and any remaining contaminants
- Quality Control: Test for gDNA contamination using quantitative PCR
Sample-Specific Recommendations
| Sample Type | Key Challenges | Pre-Purification Strategy |
|---|---|---|
| Soil & Environmental | High levels of humic substances, polyphenolics [57] | Modular phenol-chloroform extraction with additional wash steps |
| RNase-Rich Tissues (pancreas, spleen, lung) | Endogenous RNases degrade RNA [58] | Lysis buffers with RNase inhibitors; rapid processing |
| Plant Materials | Polysaccharides, polyphenols [59] | CTAB-based methods; polyvinylpyrrolidone to bind polyphenols |
| Blood Samples | Hemoglobin, immunoglobulins [59] | Gradient centrifugation; specialized blood RNA kits |
| Single-Cell Suspensions | Low RNA content, sensitive to degradation [58] | RNase inhibitors in all buffers; gentle handling |
Advanced Solutions & Technological Innovations
Synthetic Thermostable RNase Inhibitors
Recent advances include synthetic thermostable RNase inhibitors that maintain activity under conditions that would inactivate protein-based inhibitors. These offer several advantages [60]:
- Heat stability: Withstand temperatures >72°C, eliminating need for fresh addition during reverse transcription
- Treatment resistance: Maintain function after freeze-thaw cycles, pH variations, and extended vortexing
- Enhanced specificity: Can reduce primer-dimer formation in PCR applications [60]
Optimized Buffer Systems
For single-cell RNA-seq applications from RNase-rich tissues, always include RNase inhibitors in your wash and resuspension buffers. The choice of inhibitor is important, with newer synthetic options providing superior performance for challenging applications [58].
Essential Research Reagent Solutions
| Reagent Type | Function | Example Applications |
|---|---|---|
| RNase Inhibitors (protein-based or synthetic) | Protect RNA integrity during cell lysis and processing [61] [60] | Single-cell RNA-seq; RNA extraction from RNase-rich tissues [58] |
| DNase I (RNase-free) | Degrade genomic DNA contaminants in RNA preparations [57] | Pre-treatment for RNA-seq; RT-PCR sample preparation |
| Chelating Agents (EDTA, EGTA) | Bind divalent cations to prevent RNA strand scission [61] | RNA storage buffers; heating steps in RNA protocols |
| Phenol-Chloroform | Separate RNA from proteins and inhibitors in initial extraction [57] | Co-extraction of DNA/RNA from inhibitor-rich samples |
| Silica Membrane Columns | Bind and purify RNA while removing contaminants [59] | Post-extraction cleanup; inhibitor removal |
| Magnetic Beads | Selective binding of specific RNA types (e.g., polyA+ mRNA) [62] | Targeted RNA isolation; automated high-throughput systems |
Critical Validation & Quality Control
Testing DNase Efficiency
Never assume uniform DNase activity across all samples. Implement these validation steps [57]:
- Run no-RT controls for all samples in RT-PCR experiments
- Use qPCR with intercalating dyes to detect gDNA contamination
- Test multiple replicates - DNase digestion may not be uniform even in aliquots of the same sample [57]
Establishing Laboratory Schedules for RNase Control
Maintain RNA integrity throughout your experiments with this scientist-recommended schedule [61]:
Frequently Asked Questions (FAQs)
Q: My DNase-treated RNA still shows genomic contamination in PCR. What should I do? A: This indicates either insufficient pre-purification or inadequate DNase activity. First, add an additional purification step before DNase treatment. Second, ensure your purification method effectively removes inhibitors specific to your sample type. Finally, consider increasing DNase incubation time or trying a different DNase formulation [57].
Q: Can I use the same pre-purification method for all sample types? A: No. Inhibition profiles vary significantly by sample source. Soil samples often contain humic acids, plant tissues contain polyphenols, and mammalian tissues may contain high levels of endogenous RNases. Optimize your pre-purification strategy for your specific sample type [57] [58] [59].
Q: How can I test if my sample contains enzymatic inhibitors? A: Spike a known amount of control RNA or DNA into your sample pre-purification and post-purification, then attempt to amplify it. Reduced amplification efficiency in the pre-purified sample indicates presence of inhibitors. Commercial spike-in controls are available for this purpose [63].
Q: Are there any disadvantages to adding excessive RNase inhibitors to my reactions? A: Yes. While RNase inhibitors are essential, they can inhibit reverse transcriptase and PCR reactions at high concentrations. Always titrate your RNase inhibitor to find the optimal concentration for your specific application [60].
Q: What is the most overlooked step in preventing enzymatic inhibition? A: The pre-purification step before enzymatic treatment is most commonly overlooked. Many researchers proceed directly to DNase digestion after initial RNA extraction, not realizing that co-purified inhibitors remain active and interfere with enzymatic reactions [57].
FAQ: Managing Inactivation Methods in RNA Workflows
Why is autoclaving alone insufficient to create an RNase-free environment, and what are the better alternatives?
Autoclaving plasticware and aqueous solutions is a common practice, but it is not sufficient to destroy all RNase activity. RNases are remarkably robust enzymes that can refold and regain partial activity after cooling post-autoclaving [64].
For effective RNase inactivation, a multi-pronged approach is needed:
- For labware: Use sterile, disposable plasticware certified as RNase-free. For glassware, bake it at 450°F (approx. 232°C) for at least 4 hours [64] [65].
- For water and buffers: Treat them with 0.1% Diethyl Pyrocarbonate (DEPC), which inactivates RNases by covalent modification. After incubation, autoclave the solution to hydrolyze any unreacted DEPC [65]. Note that Tris-based buffers cannot be DEPC-treated, as DEPC reacts with primary amines [64] [65]. For these, use dedicated RNase-free stocks or alternative inactivation reagents like RNAsecure [64].
- For surfaces: Use commercial RNase decontamination solutions (e.g., RNaseZap) to wipe down benches, equipment, and glassware [64] [65].
How can high heat damage RNA and interfere with downstream reactions?
While high heat is sometimes used to denature proteins, it can be detrimental to RNA integrity and enzymatic reactions in several ways.
- RNA Degradation: Unlike DNA, most RNA is not stable at elevated temperatures. Heating RNA above 65°C can lead to degradation, especially in the presence of divalent cations like Mg²⁺ or Ca²⁺, which catalyze strand scission [64] [65].
- Inhibition of Enzymes: Many enzymes critical to molecular biology workflows, such as reverse transcriptases and DNases, can be denatured and inactivated by high heat. For instance, heating a DNase I-treated RNA sample to 95°C to inactivate the enzyme was shown to degrade approximately 80% of the mRNA [66].
- Compromised RNase Inhibitors: Protector RNase Inhibitor and similar proteins lose activity at temperatures above 60°C, leaving your RNA vulnerable [65].
The table below summarizes the specific risks and recommended practices.
Table 1: Pitfalls of Using High Heat in RNA Workflows
| Application | Common Pitfall | Consequence | Recommended Practice |
|---|---|---|---|
| DNase I Inactivation | Heating to 95°C for 5 minutes [66] | Degrades ~80% of mRNA [66] | Heat at 75°C for 5 minutes to preserve mRNA [66] |
| RNA Storage/Handling | Heating in presence of divalent cations (Mg²⁺, Ca²⁺) [64] | RNA strand scission and degradation [64] | Include a chelating agent; use storage solutions with low pH (~6.5) [64] |
| Reverse Transcription | Using high temperatures with standard RNase inhibitors | Inactivates the RNase inhibitor [65] | Use a thermostable RNase inhibitor for reactions above 60°C [65] |
| Melting Secondary Structures | Heating above 65°C without denaturants [65] | RNA degradation [65] | Heat to 65°C for 15 minutes in a denaturing buffer [65] |
Why must EDTA be used with caution in procedures following DNase treatment?
Ethylenediaminetetraacetic acid (EDTA) is a chelator that sequesters divalent cations like Mg²⁺ and Ca²⁺. While this property is useful for inhibiting metal-dependent RNases, it becomes problematic in subsequent enzymatic steps.
- Inhibition of Essential Enzymes: Many enzymes used in downstream applications, including reverse transcriptases, DNA polymerases (for PCR), and even the DNase I enzyme itself, require Mg²⁺ as an essential cofactor. The presence of EDTA from a previous step will chelate the Mg²⁺ in the reaction buffer, severely inhibiting or completely inactivating these enzymes [20].
- Interference with RNA Purification Kits: Spin-column-based RNA cleanup kits rely on a specific buffer composition for optimal binding. EDTA carryover can disrupt this process, leading to low RNA yield or complete failure to bind [67].
Solution: After DNase treatment, it is preferable to use a purification method that removes the DNase and EDTA without requiring heat inactivation. Many commercial kits include a resin or spin column to achieve this [20]. If you must inactivate DNase with EDTA and heat, a subsequent ethanol precipitation or additional cleanup column is necessary to remove the EDTA before proceeding to the next step.
When can Proteinase K treatment lead to RNase contamination, and how can it be prevented?
Proteinase K is a broad-spectrum serine protease used to degrade nucleases and other proteins. The primary risk of RNase contamination does not come from the Proteinase K enzyme itself, but from its origin and the reagents used in the process.
- Contaminated Enzyme Preps: Some commercially prepared or lab-isolated enzymes can be a potential source of RNase contamination [64]. If the Proteinase K used is not certified as RNase-free, it can introduce RNases into your RNA sample.
- Post-Treatment Complications: After Proteinase K treatment, a common next step is a phenol:chloroform extraction to remove the enzyme and digested proteins. If this extraction is not performed thoroughly, residual RNases from the original sample or reagents can persist and degrade the RNA during storage or subsequent steps [64].
Solution:
- Always use RNase-free Proteinase K from a reputable supplier.
- After treatment, ensure a rigorous purification step. Ambion recommends a Proteinase K treatment followed by a phenol:chloroform extraction to eliminate all traces of RNase [64].
- Finally, precipitate and resuspend the RNA in a stabilizing solution to protect it from any trace contaminants.
Research Reagent Solutions
The following table lists key reagents used to overcome inactivation pitfalls in RNA research.
Table 2: Essential Reagents for RNase Control and Sample Integrity
| Reagent | Function | Application Note |
|---|---|---|
| DEPC (Diethyl Pyrocarbonate) | Inactivates RNases in water and buffers by covalent modification [65]. | Cannot be used with Tris or other amine-containing buffers [64] [65]. |
| RNAsecure | An alternative to DEPC that inactivates RNases in solution. | Can be used to treat Tris buffers and is activated by heating at 60°C for 10 minutes [64]. |
| RNase Inhibitor (e.g., Protector, SUPERase•In) | Binds to and inhibits a broad spectrum of RNases [65]. | Essential in enzymatic reactions (e.g., reverse transcription); avoid high heat and denaturants to maintain its activity [64] [65]. |
| RNaseZap | A commercial solution for rapid decontamination of surfaces, glassware, and equipment [64]. | Wipe down benches and pipettes before starting RNA work to prevent environmental RNase introduction [64] [65]. |
| RNAlater | A tissue storage solution that rapidly penetrates tissues to stabilize and protect cellular RNA [64]. | Eliminates the immediate need to flash-freeze samples in liquid nitrogen, preserving RNA for later processing [64]. |
Experimental Workflow: A Safe DNase I Treatment Protocol
This detailed protocol, adapted from a cited study, ensures effective DNA removal while preserving RNA integrity by avoiding the pitfalls of high heat and EDTA [66].
Principle: DNase I digests contaminating genomic DNA in an RNA sample. The key is to inactivate the DNase without damaging the RNA or leaving behind inhibitors.
Reagents:
- Purified RNA sample
- RNase-free DNase I enzyme
- 10X DNase I Reaction Buffer (supplied with enzyme)
- RNase-free water
Procedure:
- Set Up Digestion: Combine the following in an RNase-free microcentrifuge tube:
- RNA sample (up to 1 µg/µL final concentration)
- 1/10 volume of 10X DNase I Reaction Buffer
- 1 Unit of DNase I per µg of RNA
- RNase-free water to final volume
- Incubate: Mix gently and incubate at 37°C for 30 minutes [66].
- Inactivate DNase I: Instead of using high heat or EDTA, use a dedicated RNA cleanup kit.
- Add the entire digestion reaction to the kit's binding buffer.
- Transfer to a spin column and wash according to the manufacturer's instructions. This step removes the DNase enzyme, salts, and nucleotides.
- Elute RNA: Elute the purified, DNA-free RNA in RNase-free water or a low-pH resuspension solution like THE RNA Storage Solution [64].
Troubleshooting Notes:
- Incomplete DNA Removal: Ensure the DNase I is active and the reaction buffer is prepared correctly. For samples with high DNA content, consider a second round of treatment.
- Low RNA Yield After Cleanup: Perform an extra wash step with the kit's wash buffer to remove salts, and ensure the elution buffer is applied directly to the center of the column membrane [67].
- Downstream Inhibition: If not using a cleanup kit, and inactivation must be done chemically, be aware that any carryover of EDTA into reverse transcription or PCR will inhibit the polymerases. A subsequent ethanol precipitation is mandatory.
Logical Workflow for Selecting an Inactivation Method
The following diagram outlines the decision-making process for choosing an appropriate RNase inactivation method based on the material being treated.
By understanding the chemistry and biology behind these common reagents, researchers can make informed decisions that protect their valuable RNA samples, ensure the success of downstream applications, and generate reliable, reproducible data.
The integrity of RNA preparations is paramount in molecular biology, directly influencing the reliability of downstream applications such as reverse transcription PCR (RT-PCR) and RNA sequencing. A significant challenge in RNA purification is the effective removal of contaminating genomic DNA (gDNA) without compromising RNA yield and quality. This guide, framed within the broader research on DNA contamination removal, provides targeted troubleshooting and FAQs to help researchers navigate this critical experimental step.
FAQs: Addressing Common Concerns on DNA Removal and RNA Preservation
Q1: Why is DNA removal necessary, and how can I check for DNA contamination? DNA contamination can lead to false-positive results in sensitive downstream applications like RT-PCR and RNA-seq. A standard method for detection is performing a "no-RT" control PCR. The amplification of a product in the absence of the reverse transcriptase enzyme indicates the presence of contaminating DNA in your RNA sample [41].
Q2: What is the most effective method for removing DNA from RNA samples? The enzymatic digestion using DNase I is considered the gold standard. DNase I is a nonspecific endonuclease that selectively cleaves both single- and double-stranded DNA without degrading RNA [41]. Other methods include acid-phenol chloroform extraction, which partitions DNA into the organic phase, and the use of specialized columns that bind gDNA [41] [68].
Q3: What are the primary causes of RNA loss during the DNA removal process? RNA loss primarily occurs during the required cleanup steps that follow DNase I digestion. Inactivating or removing the DNase enzyme often involves heat steps or the addition of chelating agents like EDTA, followed by a purification (e.g., ethanol precipitation or column cleanup) that can lead to incomplete RNA recovery [41] [20] [69].
Troubleshooting Guide: Common Problems and Solutions
This section outlines specific issues, their causes, and evidence-based solutions to maximize RNA yield during DNA decontamination.
| Problem | Cause | Solution |
|---|---|---|
| Low RNA Yield | Incomplete inactivation or removal of DNase I; incomplete RNA elution from cleanup columns [41] [69]. | Ensure proper DNase I inactivation protocol. For column cleanup, ensure elution buffer is applied directly to the matrix. Consider larger elution volumes or multiple elutions [69]. |
| DNA Contamination Persists | Insufficient DNase I activity or reaction time; inefficient homogenization leaving genomic DNA intact [20]. | Ensure sufficient homogenization to shear DNA. Use one unit of DNase I per 1-2 µg of RNA and incubate for 5-10 minutes at 37°C [41] [20]. |
| Inhibitors in Downstream Applications | Carryover of salts, ethanol, or organic solvents from cleanup steps; incomplete DNase I inactivation [20] [69]. | Perform extra wash steps with ethanol during cleanup. Ensure proper centrifugation to remove all traces of wash buffers. Visually inspect phase separation during phenol-chloroform extraction [68] [69]. |
| Degraded RNA | RNase contamination introduced during the multi-step DNA removal process [20] [69]. | Maintain an RNase-free workspace. Use dedicated equipment, RNase-free tips and tubes, and wear gloves. Work quickly and keep samples on ice when possible [41] [70]. |
Detailed Experimental Protocols
Standard DNase I Digestion and Inactivation Protocol
This is a fundamental method for direct DNA digestion in RNA samples [41].
Materials:
- RNase-free DNase I
- 10x DNase I Reaction Buffer (e.g., 100 mM Tris-HCl pH 7.6, 25 mM MgCl₂, 5 mM CaCl₂)
- 25 mM EDTA
- RNase-free water
- Water bath or heat block (37°C and 65°C)
Method:
- Digestion: Thaw the RNA sample on ice. For a 20 µl reaction, add 2 µl of 10x DNase I reaction buffer and 1 unit of DNase I per 1-2 µg of RNA. Adjust the volume with RNase-free water. Incubate at 37°C for 5-10 minutes [41].
- Inactivation: Add 2.5 µl of 25 mM EDTA (to chelate Mg²⁺ ions required for DNase I activity) and incubate at 65°C for 10 minutes [41].
- Cleanup: The sample must now be purified to remove the DNase enzyme, EDTA, and salts. This can be done using phenol-chloroform extraction followed by ethanol precipitation, or more commonly, with a commercial RNA cleanup kit [41] [69].
Integrated On-Column DNase Digestion Protocol
This streamlined approach minimizes sample handling and is highly effective at preventing RNA loss [41] [70].
Principle: The RNA is first bound to a silica membrane in a spin column. The DNase I reaction is performed directly on the membrane, digesting any co-purified DNA. Contaminants are then washed away, and pure RNA is eluted. This integrates the DNA removal and RNA cleanup into a single, efficient step.
The Scientist's Toolkit: Key Reagents and Kits
| Reagent / Kit | Function | Key Feature |
|---|---|---|
| RNase-free DNase I | Enzymatically degrades DNA contaminants in RNA samples. | Specific for DNA; requires subsequent inactivation/removal [41]. |
| On-Column DNase Kits (e.g., from Zymo Research) | Integrates DNA digestion into a silica-column RNA purification workflow. | Streamlines process; eliminates need for separate cleanup, minimizing RNA loss [41] [70]. |
| Acid-Phenol Chloroform | Organic extraction that separates RNA (aqueous phase) from DNA (interface/organic phase). | Can remove DNA without enzymatic treatment; requires skill to avoid cross-phase contamination [41] [68]. |
| Phase Lock Gel Tubes | A gel barrier that separates aqueous and organic phases during extraction. | Facilitates clean recovery of the aqueous RNA phase, preventing phenol and inhibitor carryover [68]. |
| RNA Cleanup Kits (e.g., from NEB) | Purifies RNA after DNase digestion and inactivation. | Removes salts, enzymes, and other inhibitors, preparing RNA for downstream applications [69]. |
- Choose an Integrated Method: Whenever possible, use on-column DNase I digestion. This approach significantly reduces sample handling and the number of purification steps, which is the primary factor in preserving RNA yield [41] [70].
- Optimize Homogenization: Ensure complete and rapid homogenization of the starting material. This not only releases more RNA but also shears genomic DNA, making its removal by DNase or other methods more efficient [20].
- Master Cleanup Steps: Whether precipitating RNA or using spin columns, ensure techniques are optimized. For columns, make sure elution buffer saturates the membrane. For precipitations, ensure complete resuspension of the final pellet [69].
- Maintain an RNase-free Environment: Throughout the entire process, from sample collection to the final elution, vigilant practice to prevent RNase introduction is non-negotiable for preserving RNA integrity and quantity [20] [71].
Frequently Asked Questions (FAQs)
1. Why is genomic DNA (gDNA) contamination a problem in RNA preparations? gDNA contamination is a frequent issue that can lead to false-positive results in sensitive downstream applications like RT-qPCR and RNA-seq, thereby compromising data accuracy. This is especially critical for long non-coding RNAs (lncRNAs) like MALAT1 and NEAT1, which lack introns; without exon-intron junctions, primers cannot be designed to distinguish cDNA from gDNA, making amplification from contaminating DNA a significant risk [40]. This contamination alters the quantification of transcripts, particularly low-abundance ones, and can raise false discovery rates in RNA-seq analyses [17].
2. How can I tell if my RNA sample is contaminated with gDNA? Several indicators can signal gDNA contamination:
- Spectrophotometry: Low A260/280 ratios may indicate residual protein, but this is not a specific indicator for gDNA [72].
- Gel Electrophoresis: High molecular weight smearing on a gel can suggest the presence of gDNA [20].
- PCR Amplification: The most definitive check is to perform a PCR reaction on your RNA sample without reverse transcription (a No-RT control). Amplification in this control indicates gDNA contamination [20].
- RNA-seq Data: A higher-than-expected mapping ratio of reads to intergenic regions can suggest gDNA contamination [17].
3. Will performing a DNase I treatment degrade my RNA or lower its RIN? When performed correctly, an on-column DNase I digestion is highly effective and minimizes the risk of RNase contamination or RNA degradation. The reaction occurs in an optimized buffer on the purification column, and subsequent wash steps remove the enzyme and any divalent cations before elution, preserving RNA integrity [72]. In-tube DNase treatments followed by a cleanup step are also effective but may involve more handling.
4. My RNA has a high RIN but my downstream applications are failing. Could salt carryover be the issue? Yes. Residual guanidine salts from lysis or wash buffers can inhibit enzymatic reactions in downstream applications. This is often indicated by a low A260/230 ratio. Ensuring complete wash steps and careful technique to avoid contact between the column membrane and flow-through can prevent this. Additional washes or extended spin times may be necessary [72] [73].
5. What is the best way to preserve tissue samples for RNA extraction to ensure a high RIN? Immediate stabilization is key. While snap-freezing in liquid nitrogen is effective, it presents logistical challenges. Research comparing methods has shown that preservation in reagents like RNAlater demonstrates statistically superior performance, delivering enhanced RNA yield, purity, and integrity (RIN) compared to snap-freezing for challenging tissues like dental pulp [74]. These reagents permeate tissue, inactivating RNases without the need for immediate freezing.
Troubleshooting Guide
The following table outlines common problems, their causes, and proven solutions related to DNA contamination and RNA integrity.
| Problem | Cause | Solution |
|---|---|---|
| DNA Contamination | Incomplete gDNA shearing during homogenization or omission of DNase step [20]. | - Use a rigorous homogenization method (e.g., bead beater) to shear gDNA.- Perform an on-column DNase I treatment during the purification protocol [72]. |
| Low RIN / RNA Degradation | RNase activity during collection, handling, or extraction [72] [20]. | - Flash-freeze tissues or use RNA stabilization reagents (e.g., RNAlater) immediately upon collection [74] [75].- Add beta-mercaptoethanol (BME) to lysis buffer to inactivate RNases.- Work quickly with pre-chilled equipment and use RNase-free consumables. |
| Low Yield | Incomplete tissue homogenization or lysis; incomplete elution from column [72] [20]. | - Ensure complete tissue disruption by increasing homogenization time.- For column-based kits, ensure the elution buffer is applied directly to the membrane and incubate for 5-10 minutes at room temperature [72]. |
| Low A260/230 (Salt Carryover) | Residual guanidine salts from wash buffers not fully removed [72] [73]. | - Ensure wash steps are performed as recommended.- Perform an additional wash step and extend the final centrifugation time.- Blot the rim of the collection tube on a clean wipe before reusing it in the final elution step [72]. |
| Inhibition in Downstream Apps | Carryover of salts, ethanol, or other contaminants from the purification process [73]. | - Ensure the tip of the spin column does not contact the flow-through during washes.- Re-centrifuge the column after the final wash to remove residual ethanol.- Consider a second cleanup step to desalt the RNA sample. |
Experimental Protocols & Data
Protocol: On-Column DNase I Digestion
This protocol is adapted from standard procedures used in kits like the Monarch Total RNA Miniprep Kit to effectively remove gDNA while preserving RNA integrity [72].
Materials:
- DNase I, RNase-free
- DNase I Reaction Buffer
- RNA Purification Spin Columns and Collection Tubes
- RNA Wash Buffers
- Nuclease-free Water
Method:
- Following sample lysis and binding of RNA to the purification column, prepare the DNase I reaction mix. A typical reaction for a single column includes 5-10 µl of DNase I and 70 µl of DNase I Reaction Buffer.
- Apply the entire reaction mix directly onto the center of the column membrane.
- Incubate the column at room temperature (15-25°C) for 15 minutes.
- After incubation, add the recommended Wash Buffer and continue with the standard purification protocol, including all subsequent wash steps, to completely remove the DNase enzyme.
- Elute the purified, DNA-free RNA with nuclease-free water.
Quantitative Data: Comparison of RNA Preservation Methods
A 2025 study systematically evaluated preservation methods for human dental pulp tissue, a challenging source due to high RNase activity. The results below demonstrate the impact of preservation choice on RNA quality and yield [74].
| Preservation Method | Average Yield (ng/µl) | Mean RIN | Achieved Optimal RNA Quality |
|---|---|---|---|
| RNAlater Solution | 4,425.92 ± 2,299.78 | 6.0 ± 2.07 | 75% of samples |
| RNAiso Plus Reagent | Not explicitly stated (1.8x lower than RNAlater) | Not explicitly stated | Not explicitly stated |
| Snap Freezing | 384.25 ± 160.82 | 3.34 ± 2.87 | 33% of samples |
The Impact of gDNA Contamination on RNA-seq
A 2022 study added varying amounts of gDNA to total RNA to quantify its effect on RNA-seq analysis. The key findings were [17]:
- Residual DNA: Approximately 1.8% residual gDNA contamination was estimated in total RNA even after DNase treatment.
- Library Method Matters: Ribo-Zero (rRNA depletion) libraries were significantly more sensitive to gDNA contamination than Poly(A) selection libraries.
- False Positives: At 1% gDNA contamination, hundreds of differentially expressed genes (DEGs) were falsely identified in Ribo-Zero libraries, with 94.1% being low-abundance transcripts.
Workflow Visualization
The following diagram illustrates the critical decision points in an RNA extraction protocol to effectively balance DNA removal with the preservation of a high RIN score.
The Scientist's Toolkit: Essential Reagents for Success
| Reagent / Material | Function | Consideration |
|---|---|---|
| RNAlater Stabilization Solution | Preserves RNA integrity in fresh tissues by inactivating RNases at non-freezing temperatures; ideal for field/clinical collection [74] [75]. | Superior to snap-freezing for yield and RIN in some tissues. Logistically simpler than liquid nitrogen [74]. |
| DNase I, RNase-free | Enzyme that digests and removes contaminating genomic DNA. | Essential for applications sensitive to DNA contamination (e.g., RT-qPCR, RNA-seq). On-column treatment is most convenient [72] [40]. |
| Silica Spin Columns | Bind and purify RNA from complex lysates, separating it from proteins, metabolites, and other contaminants. | Allow for integrated on-column DNase treatment and efficient washing to remove salts and inhibitors [72] [73]. |
| Beta-Mercaptoethanol (BME) | A reducing agent that denatures proteins and inactivates RNases during the lysis and homogenization steps. | Critical for RNase-rich tissues. Always add fresh to the lysis buffer as recommended by the protocol [20]. |
| Nuclease-Free Water | Used to elute purified RNA and prepare reagent solutions. | Essential for preventing RNase contamination after purification. Do not use DEPC-treated water with kits that advise against it [72] [20]. |
In the broader context of research on removing DNA contamination from RNA preparations, the failure of DNase treatment represents a critical bottleneck that can compromise the integrity of downstream applications like RNA sequencing (RNA-seq). Genomic DNA (gDNA) contamination in RNA samples leads to inaccurate gene expression quantification, elevated false discovery rates for differentially expressed genes, and the erroneous identification of novel transcriptional elements [17]. This guide provides a systematic, step-by-step troubleshooting approach for researchers and drug development professionals facing persistent DNA contamination despite standard DNase protocols.
Diagnosing the Problem: A Step-by-Step Flowchart
Follow this logical workflow to identify and correct the reasons for unsuccessful DNase treatment. The diagram below outlines the key decision points and actions.
Title: DNase Failure Troubleshooting Path
Quantitative Impact of gDNA Contamination
Understanding the concrete effects of gDNA contamination underscores the importance of effective removal. The following table summarizes key quantitative findings from controlled studies.
Table 1: Impact of gDNA Contamination on RNA-seq Data
| Contamination Level | Effect on Poly(A) Selection Libraries | Effect on Ribo-Depletion (Ribo-Zero) Libraries | Primary Consequence |
|---|---|---|---|
| 0.01% - 0.1% | Minimal change in expression profiling [17] | Beginning of clustering separation from pure samples in PCA [17] | Slight increase in intergenic mapping reads |
| 1% | Negligible number of Differentially Expressed Genes (DEGs) [17] | Significant number of DEGs; distinct clustering in HCA/PCA [17] | Substantial increase in false-positive DEGs |
| 10% | Expression profiling remains largely stable [17] | Severe distortion of expression profiles; clusters with non-DNase treated samples [17] | Profoundly inaccurate quantification, especially of low-abundance transcripts [17] |
| Residual Post-DNase (Estimated) ~1.8% | Not significant [17] | Alters quantification of low-abundance transcripts [17] | Elevated false discovery rates [17] |
Essential Protocols for Verification and Remediation
Protocol: Confirming gDNA Contamination via Fragment Analysis
Purpose: To objectively detect and quantify the presence of gDNA in an RNA sample prior to sequencing [76].
- Materials: Bioanalyzer or TapeStation system (Agilent), RNA-specific reagents (e.g., RNA Nano Kit).
- Method:
- Prepare the RNA sample and ladder according to the instrument's protocol.
- Load the samples onto the designated chip or cartridge.
- Run the analysis and inspect the resulting electropherogram.
- Interpretation: A high-quality RNA sample will show sharp peaks for the 18S and 28S ribosomal RNAs with a flat baseline. The presence of high molecular weight fragments, appearing as a large peak or smear at the top of the size range, indicates gDNA contamination [76].
Protocol: Post-Extraction DNase Digestion
Purpose: To remove gDNA contamination from an already purified RNA sample.
- Materials: DNase I (RNase-free), 10x DNase Reaction Buffer (containing Mg²⁺ or Mn²⁺), EDTA.
- Method:
- Combine up to 5 µg of RNA with 1x Reaction Buffer and 1 U of DNase I per µL in a nuclease-free tube.
- Incubate at 37°C for 20-30 minutes [76].
- Stop the reaction by adding EDTA to a final concentration of 5 mM and incubating at 65°C for 10 minutes to inactivate the enzyme.
- Purify the RNA using a silica-column-based cleanup kit to remove the enzyme, salts, and digested DNA fragments. Elute in nuclease-free water.
The Scientist's Toolkit: Key Reagents and Solutions
The following table lists essential materials for effectively preventing and addressing DNA contamination.
Table 2: Research Reagent Solutions for DNA Contamination
| Item | Function & Rationale | Key Considerations |
|---|---|---|
| DNase I (RNase-free) | Enzymatically degrades double- and single-stranded DNA. | Verify it is certified RNase-free. Check the required cation cofactor (Mg²⁺) is provided in the buffer [77]. |
| 10x DNase Reaction Buffer | Provides optimal pH and cation (Mg²⁺/Mn²⁺) conditions for DNase I activity. | Always prepare a fresh 1x working solution. Inadequate Mg²⁺ is a common cause of failure. |
| Silica-membrane Purification Columns | Remove proteins, salts, and digested nucleic acids after DNase treatment. | Essential for cleaning the reaction post-digestion. Prevents carryover of inhibitors into downstream steps [77]. |
| RNase Inhibitors | Protect RNA integrity during the DNase treatment incubation. | Critical when working with sensitive RNA or during long incubations. |
| Nuclease-free Water | Used for resuspending RNA and preparing reagents. | Prevents the introduction of external nucleases that could degrade RNA or the DNase enzyme. |
| EDTA (Ethylenediaminetetraacetic acid) | Chelates Mg²⁺ ions, thereby irreversibly inactivating DNase I after incubation. | A required step to prevent residual DNase activity from degrading cDNA in future steps. |
Proving Your RNA is Clean: Robust Methods to Validate and Quantify DNA Removal
In the field of gene expression analysis, the accuracy of reverse transcription quantitative PCR (RT-qPCR) is paramount. A significant threat to this accuracy is contamination from residual genomic DNA (gDNA) in RNA preparations. This article details the use of the "No Reverse Transcriptase" control, or 'No-RT' control, as a fundamental experimental technique for detecting this contamination, thereby ensuring the integrity of your RNA-derived data.
Frequently Asked Questions (FAQs)
1. What is a No-RT control and what is its purpose? A No-RT control is a reaction that is identical to your main RT-qPCR setup but omits the reverse transcriptase enzyme [78] [79]. Some protocols refer to this as a "minus reverse transcriptase control" (MRT) [78]. Its purpose is to assess the amount of DNA contamination present in an RNA preparation [78]. By lacking the enzyme to create cDNA, any amplification signal observed in this control must originate from contaminating DNA, such as gDNA or previous PCR products [80] [79].
2. How do I interpret the results of my No-RT control? The results determine whether your RNA sample requires further purification or your assay requires redesign.
- Acceptable Result: A significantly delayed amplification curve in the No-RT control compared to the experimental RT(+) sample. A common benchmark is a difference of at least five quantification cycles (Cq), indicating that less than 3% of the total signal comes from gDNA [80].
- Unacceptable Result: Amplification in the No-RT control that is similar to or only slightly delayed from the test sample. This indicates a level of gDNA contamination that could skew your gene expression results and must be addressed [80].
3. My No-RT control shows amplification. What should I do next? If your No-RT control indicates significant gDNA contamination, you have several options to mitigate the issue, which can be used in combination:
- DNase Treatment: Treat your RNA sample with DNase I or dsDNase to degrade the contaminating DNA before proceeding with the reverse transcription reaction [81] [79].
- Optimize Assay Design: Redesign your qPCR primers to span an exon-exon junction or to flank a long intron. This ensures that the much larger genomic DNA template cannot be efficiently amplified, while the cDNA target can [81].
- Try Advanced Methods: Consider alternative methods like the ValidPrime assay, which uses a gDNA-specific probe targeting a non-transcribed genomic region to more accurately measure and correct for the gDNA contribution in each sample [80].
4. Can I use a No-RT control with any reverse transcription kit? Yes, the principle is universally applicable. For specific kits, the method might involve a step like heat-inactivating the enzyme. For instance, with the SuperScript VILO Master Mix, you can run a No-RT control by heat-inactivating the SuperScript III Reverse Transcriptase enzyme for 5 minutes at 85°C before continuing with the protocol [82].
5. Are there other essential negative controls for RT-qPCR? Yes, a comprehensive RT-qPCR experiment includes other key negative controls to ensure specificity [78]:
- No Template Control (NTC): Omits any RNA or DNA template from the reaction to check for contamination of reagents or primer-dimer formation [78].
- No Amplification Control (NAC): Omits the DNA polymerase to assess background fluorescence from degraded probes (not needed for SYBR Green chemistry) [78].
Troubleshooting Guide
This guide helps diagnose and solve common problems identified by the No-RT control.
| Problem | Possible Cause | Recommended Solutions |
|---|---|---|
| Amplification in No-RT control | Genomic DNA contamination in RNA sample [80] [79] | - Treat RNA with DNase I [81] [79].- Redesign primers to span exon junctions [81].- Use a dedicated gDNA removal kit. |
| Amplicon contamination from previous runs [79] | - Use a unidirectional workflow (separate pre- and post-PCR areas) [79].- Use filter tips or positive displacement pipettes [79].- Decontaminate surfaces with 5% bleach or UV light [79]. | |
| Amplification in NTC | Contaminated reagents or primer-dimer formation [78] | - Prepare fresh reagent aliquots [79].- Check primer specificity and optimize reaction conditions. |
Experimental Protocol: Implementing the No-RT Control
Objective: To detect the presence of contaminating genomic DNA in an RNA sample prior to gene expression analysis by RT-qPCR.
Principle: The control reaction lacks the reverse transcriptase enzyme. Therefore, during the subsequent qPCR step, amplification can only occur if double-stranded DNA (like gDNA) is present in the original RNA sample, providing a direct check for contamination.
Materials:
- RNA sample
- Reverse transcription kit (e.g., High Capacity cDNA Reverse Transcription Kit)
- Nuclease-free water
- PCR tubes and pipettes
Procedure:
- Prepare the main reverse transcription reaction (RT+) according to your kit's instructions for your RNA sample.
- Prepare the No-RT control reaction in a separate tube. Use the exact same master mix and volume of RNA as the RT+ reaction, but replace the reverse transcriptase enzyme with an equivalent volume of nuclease-free water [78].
- Run both tubes through the reverse transcription protocol on your thermal cycler.
- Proceed with the qPCR amplification for both your RT+ and No-RT control reactions using your gene-specific primers.
- Compare the Cq values between the RT+ sample and the No-RT control. A Cq difference of less than 5 cycles indicates significant gDNA contamination that must be addressed [80].
Research Reagent Solutions
The following table lists key reagents and their functions for implementing and troubleshooting DNA contamination controls.
| Item | Function in Controlling DNA Contamination |
|---|---|
| DNase I | Enzyme that degrades single- and double-stranded DNA contaminants in RNA samples [81] [79]. |
| Exon-Junction Spanning Primers | qPCR primers designed to bind to sequences in two different exons, preventing efficient amplification of intron-containing genomic DNA [81]. |
| ValidPrime Assay | An alternative method using a probe for a non-transcribed genomic region to precisely measure gDNA contamination and correct the final qPCR data [80]. |
| RNase-free Water | Used to replace the reverse transcriptase in the No-RT control reaction [78]. |
| Filter Pipette Tips | Create a barrier to prevent aerosol contamination from pipettes, a common source of cross-contamination [79]. |
Experimental Workflow for Contamination Control
The following diagram illustrates the logical workflow for using the No-RT control and subsequent actions based on its results.
Universal rDNA-based quantitative PCR (qPCR) assays represent a powerful methodological advancement for detecting microbial and cross-species contamination in biological samples. These assays exploit the unique properties of ribosomal DNA (rDNA) genes—specifically their highly conserved sequences and multicopy nature within genomes—to achieve exceptional sensitivity in contamination detection [83]. The technology is particularly valuable for quality control in cell culture, biopharmaceutical production, and clinical diagnostics, where undetected contaminants can compromise experimental integrity or patient safety.
Traditional culture-based contamination detection methods present significant limitations, including prolonged incubation periods (ranging from 21-29 days for mycoplasma detection) and potential failure to identify fastidious microorganisms with complex nutritional requirements [84]. In contrast, rDNA-based qPCR assays can reduce detection time to just 1-2 hours while simultaneously improving detection sensitivity and specificity [84]. This rapid, culture-independent approach enables researchers to quickly identify contamination sources and implement corrective measures, thereby safeguarding valuable cell lines, biological products, and research outcomes.
Experimental Protocols
Protocol 1: Universal Primer Design for rDNA-Based Contamination Detection
The effectiveness of universal rDNA-based assays depends on careful primer design targeting appropriate genomic regions:
Target Region Identification: Focus on ribosomal DNA regions, particularly the 16S-23S internal transcribed spacer (ITS) or the 23S-5S ITS [85]. While the 16S and 23S rRNA genes themselves are relatively conserved across species, the intervening ITS regions display discernible length heterogeneity and sequence variations that can be exploited for species identification [85].
Sequence Retrieval and Alignment: Retrieve full-length rDNA sequences from databases such as NCBI (using keywords like "internal transcribed spacer"). Perform cross-species sequence alignment using tools like ClustalW to identify conserved regions suitable for universal primer binding [83].
Primer Design Strategy: Design primers that either:
Enhancing Binding Breadth: To improve broad binding potential across diverse bacterial species, incorporate mixed bases (in a 1:1 ratio) and the universal base inosine at the 3' end of primers to facilitate polymerase extension despite potential mismatches [85].
Validation: Establish primer binding sites and predict amplification profiles using bioinformatic tools. Calculate binding affinity (ΔG), with sites having ΔG < -9 kcal/mole considered adequately stable for amplification [85].
Protocol 2: Sample Processing and DNA Extraction
Proper sample handling is crucial for accurate contamination detection:
Sample Homogenization: Homogenize tissue samples (100 mg) in a 2.0 mL tube with stainless steel beads using a homogenizer at 25-30 Hz for 30 seconds (adjust based on tissue type) [83].
Nucleic Acid Extraction: Isolate total RNA and DNA using commercial kits according to manufacturer instructions [83].
Quality Assessment:
- Control purity and quantity by measuring absorbance at 260 nm and 280 nm. Acceptable A260/A280 ratios are ≥1.8 for DNA and >2.0 for RNA [83].
- Assess DNA quality via 0.7% agarose gel electrophoresis. High-quality genomic DNA appears as a sharp, high-molecular-weight band [83].
- Check RNA integrity using denaturing agarose gel electrophoresis with guanidine thiocyanate or capillary electrophoresis. Intact eukaryotic RNA shows sharp 28S and 18S rRNA bands with a 2:1 intensity ratio [83].
Protocol 3: qPCR Amplification and Analysis
The core detection methodology involves optimized qPCR amplification:
Reaction Setup: Use iTaq polymerase or similar master mixes according to manufacturer instructions. A typical 23 μL reaction mixture includes:
- 200 nM of each universal oligonucleotide primer
- 100 nM fluorescent-labeled probe (e.g., 6-FAM-labeled with TAMRA quencher)
- PCR buffer with 6 mM MgCl₂
- 200 μM of each dNTP (dATP, dCTP, dGTP, and dUTP)
- 0.125 U of DNA polymerase [86]
Thermocycling Parameters:
Data Analysis: Set the fluorescence threshold in the exponential phase of amplification. The quantification cycle (Cq) is defined as the cycle number at which fluorescence emission significantly exceeds background levels [88].
Troubleshooting Guides & FAQs
Common Experimental Challenges and Solutions
Table 1: Troubleshooting qPCR Amplification Issues
| Observation | Probable Cause(s) | Solution(s) |
|---|---|---|
| Exponential amplification in No Template Control (NTC) | Contamination from laboratory environment or reagents [88] | Clean work area with 10% bleach; prepare reaction mix in clean lab separate from templates; order new reagent stocks [87] [88] |
| Unusually shaped amplification; irreproducible data | Poor PCR efficiency; primer Tm differences >5°C; annealing temperature too low; template contains inhibitors [88] | Optimize primer concentrations and annealing temperature; redesign primers; dilute input samples to reduce inhibitors [88] |
| Jagged signal throughout amplification plot | Poor amplification or weak probe signal; mechanical error; buffer-nucleotide instability [88] | Ensure sufficient probe amount; try fresh probe batch; mix solutions thoroughly during setup [88] |
| Technical replicates show Cq differences >0.5 cycles | Pipetting error; insufficient mixing; low expression of target; poorly optimized reaction [88] | Calibrate pipettes; use positive-displacement pipettes and filtered tips; mix all solutions thoroughly; optimize reaction conditions [88] |
| Unexpected early Cq values | Genomic DNA contamination of RNA; multiple products; high primer-dimer production [88] | DNAse-treat RNA before reverse transcription; redesign primers for specificity; optimize primer concentration [88] |
Frequently Asked Questions
Q: Why does genomic DNA contamination pose a particular problem for universal rDNA-based assays? A: Genomic DNA can serve as a template during PCR amplification, leading to false positives and overestimation of target abundance. This problem is exaggerated in universal rDNA assays because they target highly conserved, multicopy genes present in all bacteria [83] [86]. Even minimal DNA contamination can generate significant background signal.
Q: What is the most effective method for removing DNA contamination from RNA samples? A: DNase I digestion has consistently proven to be the most effective method for removing DNA contamination from RNA samples [89]. Treatment with RNase-free DNase I, followed by inactivation using specialized removal reagents or heat, can essentially eliminate genomic DNA contamination without compromising RNA integrity.
Q: How can I verify that my RNA sample is free of DNA contamination after treatment? A: Include a no-reverse transcriptase control (NRT) in your qPCR experiments. This control contains all reaction components except the reverse transcriptase enzyme. Amplification in the NRT control indicates persistent DNA contamination, while absence of amplification confirms successful DNA removal [83].
Q: Why are universal rDNA primers particularly susceptible to reagent contamination issues? A: The highly sensitive nature of qPCR chemistry, combined with the use of universal primers targeting conserved bacterial sequences, makes these assays vulnerable to contamination from bacterial DNA present in reagent preparations [86]. Taq DNA polymerase enzyme may contain contaminating DNA from its manufacturing process, which is then amplified by the universal primers.
Q: What specific steps can I take to reduce contaminating DNA in reagents? A: Several methodologies can be applied, though with varying impacts on sensitivity:
- UV irradiation (may reduce PCR sensitivity by 4-log)
- 8-methoxypsoralen with UV (5-7 log reduction in sensitivity)
- DNase treatment (1.66-log reduction in sensitivity) [86] Using ultrapure reagents specifically guaranteed to be DNA-free provides the most reliable solution.
Research Reagent Solutions
Table 2: Essential Research Reagents for Universal rDNA-Based Assays
| Reagent Type | Specific Examples | Function & Application Notes |
|---|---|---|
| Nucleic Acid Extraction Kits | RNAqueous-4PCR Kit; QIAamp DNA Blood Kit; MagNA Pure 96 systems [90] [89] | Purify total RNA/DNA; some kits combine phenol-free RNA isolation with effective DNase I treatment [89] |
| DNase Treatment Reagents | RNase-free DNase I; DNA-free DNase Removal Reagent [89] | Remove genomic DNA contamination from RNA samples; specialized removal reagents eliminate need for heat inactivation [89] |
| qPCR Master Mixes | Luna Universal One-Step RT-qPCR Kit; Luna Universal Probe One-Step RT-qPCR Kit [87] | Provide optimized reaction components for sensitive detection; some include UDG to prevent carryover contamination [87] |
| Polymerases | iTaq polymerase; LongAmp Taq 2x MasterMix; AmpliTaq DNA Polymerase [85] [86] | Amplify target sequences; for long amplicons (>1kb), specialized polymerases provide better efficiency [90] [85] |
| Contamination Control Reagents | Antarctic Thermolabile UDG; 8-methoxypsoralen (8-MOP) [87] [86] | Degrade carryover contamination from previous PCR products; UDG is preferred due to lower impact on sensitivity [87] |
Workflow and Conceptual Framework
The following diagram illustrates the conceptual framework and experimental workflow for universal rDNA-based contamination detection:
Universal rDNA-based assays provide researchers with a powerful, sensitive, and rapid method for detecting cross-species contamination across diverse experimental systems. By implementing the protocols, troubleshooting guides, and reagent solutions outlined in this technical support document, researchers can significantly enhance the reliability and reproducibility of their molecular analyses while maintaining the integrity of their biological samples.
Frequently Asked Questions (FAQs)
Q1: Can I rely solely on spectrophotometry to confirm the absence of DNA in my RNA preparation?
A: No. Spectrophotometry cannot distinguish between RNA and DNA [91]. Both nucleic acids absorb light at 260 nm, so the measured concentration is a sum of all nucleic acids present. A good A260/A280 ratio (~1.8-2.1) indicates low protein contamination but does not confirm the absence of DNA [92] [91]. DNA contamination must be addressed with specific enzymatic treatments and verified with other methods.
Q2: My RNA sample has perfect spectrophotometry ratios (A260/A280 = 2.1, A260/A230 > 1.8) but is performing poorly in qPCR. Could DNA be the cause?
A: Yes. This is a common scenario. Spectrophotometry confirms purity from proteins and salts but not from DNA [92] [91]. The DNA contaminants can act as templates in your qPCR reactions, leading to inaccurate quantification of your RNA target, high background, or false positives. You should treat your RNA sample with DNase I and use no-reverse-transcriptase (no-RT) controls in your qPCR assays.
Q3: What is the most reliable method to detect DNA contamination in an RNA sample?
A: The most direct and sensitive method is to use an aliquot of your RNA sample in a no-reverse-transcriptase (no-RT) control qPCR assay, targeting a constitutively present genomic DNA sequence (e.g., a housekeeping gene). Amplification in the no-RT control indicates the presence of contaminating DNA [93]. Gel electrophoresis can also reveal DNA contamination as a high-molecular-weight band above the ribosomal RNA bands [92].
Troubleshooting Guide
Problem: Suspected DNA Contamination in RNA Samples
DNA contamination can compromise a wide range of downstream applications, particularly in sensitive techniques like RT-qPCR and RNA sequencing. The table below outlines symptoms, causes, and solutions.
| Symptom | Potential Cause | Recommended Solution |
|---|---|---|
| High molecular weight band on agarose gel [92] | Genomic DNA carryover during purification | Perform on-column or in-tube DNase I digestion during RNA purification [93]. |
| Amplification in no-RT qPCR controls [93] | Residual amplifiable DNA fragments | Treat purified RNA with DNase I, then inactivate the enzyme and re-purify the RNA [93]. |
| Inflated RNA concentration and abnormal A260/A280 | Co-purification of DNA, skewing spectrophotometry readings [94] | Use fluorometry for accurate RNA quantification, as it is more specific and less affected by contaminants [91]. |
| High background or off-target signals in NGS | DNA contamination interfering with library preparation | Implement integrated DNA and RNA-based NGS assays where DNA-level results can help identify and account for such contamination [95]. |
Problem: Discrepancies Between Spectrophotometry and Other Methods
Spectrophotometry can overestimate nucleic acid concentration due to interference from common contaminants. The table below summarizes why discrepancies occur and how to resolve them.
| Observation | Explanation | Resolution |
|---|---|---|
| Spectrophotometry reports higher DNA concentration than fluorometry [96] | Chemical residues (e.g., guanidine salts, phenol) from the extraction process absorb at 260 nm [96]. | Use fluorometry for accurate quantification, as fluorescent dyes bind specifically to nucleic acids [91]. |
| Low A260/A230 ratio (<1.8) | Contamination with salts (e.g., guanidine) or organic compounds like phenol [92] [91]. | Ensure complete removal of wash buffers during purification. Re-precipitate or re-purify the sample if necessary [93]. |
| Low A260/A280 ratio (<1.8) | Protein contamination [91]. | Repeat the organic extraction or purification step, ensuring careful phase separation. |
Experimental Protocols for Quality Control
Protocol 1: DNase I Treatment of Purified RNA
This protocol is for removing DNA contamination from already purified RNA samples.
- Prepare Reaction Mix: Combine the following in a nuclease-free tube:
- 1-5 µg of RNA sample
- 1 µL of 10X DNase I Reaction Buffer
- 1 µL of RNase-free DNase I (e.g., 1 unit)
- Nuclease-free water to a final volume of 10 µL.
- Incubate: Mix gently and incubate at 37°C for 15-30 minutes.
- Inactivate DNase I: Add 1 µL of STOP Solution (e.g., 50 mM EDTA) and heat at 65°C for 10 minutes to inactivate the enzyme. Alternatively, re-purify the RNA using a standard RNA cleanup protocol to remove the DNase and EDTA [93].
- Verify Purity: Use a no-RT control qPCR to confirm the removal of DNA.
Protocol 2: Assessing RNA and DNA Purity via Agarose Gel Electrophoresis
This protocol provides a visual assessment of RNA integrity and can indicate gross DNA contamination [92].
- Prepare a 1% Agarose Gel: Melt agarose in TAE or TBE buffer and cast a gel with appropriate wells.
- Load Samples: Mix 100-500 ng of your nucleic acid sample with a DNA loading dye. Note: Do not use RNA-specific denaturing gels for this check, as you want to see the DNA.
- Run Gel: Conduct electrophoresis at 5-8 V/cm until the dye front has migrated sufficiently.
- Visualize and Interpret: Image the gel under UV light.
- Intact RNA: Shows two sharp ribosomal RNA bands (28S and 18S in eukaryotes), with the 28S band approximately twice as intense as the 18S band [94].
- DNA Contamination: Appears as a high-molecular-weight band that migrates more slowly than the 28S rRNA band [92].
- Degraded RNA: Appears as a smeared lane with no distinct ribosomal bands.
The Scientist's Toolkit: Research Reagent Solutions
| Item | Function | Considerations |
|---|---|---|
| RNase-free DNase I | Enzymatically degrades DNA contaminants in RNA samples. | Essential for pre-PCR workflows. Ensure it is RNase-free to avoid degrading your sample [93]. |
| Nuclease-free Water | Diluent and reagent for molecular biology reactions. | Prevents introduction of nucleases that could degrade samples [93]. |
| DNA/RNA Protection Reagent | Maintains nucleic acid integrity in starting material during storage. | Prevents degradation that can complicate later analysis [93]. |
| Fluorometric Quantification Kit | Precisely quantifies RNA using RNA-binding fluorescent dyes. | More specific and accurate than spectrophotometry for RNA, especially for low-concentration samples [91]. |
| NanoDrop Spectrophotometer | Provides rapid, micro-volume assessment of nucleic acid concentration and purity ratios. | Ideal for quick checks, but be aware of its limitations regarding DNA contamination and chemical interference [92]. |
| Agilent Bioanalyzer | Provides an automated, high-sensitivity assessment of RNA integrity (RIN) and sample profile. | The gold standard for evaluating RNA quality before next-generation sequencing; detects degradation not visible on gels [94]. |
Workflow Diagram: Assessing RNA Purity and Detecting DNA Contamination
The following diagram illustrates the logical workflow for assessing an RNA preparation, highlighting the specific limitations of spectrophotometry and gel electrophoresis in detecting DNA contamination.
FAQs: Understanding RNA Integrity Numbers (RIN) and Electropherograms
Q1: What do RIN and RINe scores measure, and what is considered a good score? The RNA Integrity Number (RIN) and its equivalent for TapeStation systems (RINe) are algorithms that assign a numerical value to the quality of total RNA, with 1 representing completely degraded RNA and 10 representing perfectly intact RNA [97] [98]. These scores are derived from the entire electrophoretic trace of the RNA sample, not just the ribosomal ratios. For sensitive downstream applications like microarrays or RNA sequencing, a minimum RIN score of 7.8 is often required, though many high-quality samples score between 8.5 and 10 [97].
Q2: My Bioanalyzer electropherogram shows unusual peaks. What could this mean? While typical eukaryotic RNA shows two dominant ribosomal peaks (18S and 28S), variations can indicate specific conditions. A pattern where the 18S peak is more intense than the 28S, or where ribosomal bands appear smeared, suggests RNA degradation [20]. Conversely, the presence of unexpected sharp peaks in the electropherogram of amplified cRNA targets can indicate highly abundant specific mRNAs, which is a biological characteristic of certain tissues like lacrimal gland, rather than a quality issue [97].
Q3: Can I use the same electrode cartridge for DNA and RNA assays on the Bioanalyzer? No. To prevent RNase contamination, it is crucial to use a dedicated electrode cartridge (p/n 5065-4413) exclusively for RNA assays [99]. Using a cartridge that has been in contact with DNA samples can lead to RNase contamination and rapid degradation of your RNA samples and ladder during the chip run.
Q4: The RIN is not displayed (shows as NA) for my total RNA sample. Why? First, verify that you selected a total RNA assay in the software, as the RIN is only calculated for these specific assays [99]. If the correct assay was selected, the "NA" result is often accompanied by an "Unexpected signal" error (Error 4501), which can be caused by significant sample degradation, contamination, or improper sample handling.
Troubleshooting Guides
Troubleshooting Degraded RNA Ladder and Samples on the Bioanalyzer
Observed Problem: The Bioanalyzer RNA ladder and/or sample electropherograms show signs of degradation. A partially degraded ladder may have a shifted baseline and reduced peak heights, while a fully degraded ladder appears as a smear with no distinct peaks [99].
Resolution Steps: If you suspect degradation, first confirm the quality of the ladder and samples using an alternative method, such as the Agilent TapeStation or Fragment Analyzer systems [99]. If they were not degraded prior to chip loading, the contamination likely occurred during chip preparation. Follow this systematic decontamination procedure before running a new chip:
- RNase Decontamination: Perform a full RNase decontamination of the electrode cartridge as detailed in Chapter 8 of the Agilent 2100 Bioanalyzer System Maintenance and Troubleshooting Guide [99].
- Use New Consumables:
- Use a new electrode cleaner chip (p/n 5065-9951).
- Open a new box of certified RNase-free pipette tips.
- Use a new flask of RNase-free water.
- Prepare a fresh ladder aliquot from a new stock if all current aliquots are suspect [99].
- Decontaminate the Workspace:
- Thoroughly decontaminate the lab bench and pipettes with RNaseZAP or an equivalent RNase decontamination solution [99].
Table 1: Bioanalyzer Electrode Cartridge Maintenance Schedule
| Kit Type | Before Each Run | After Each Run | Monthly or After Liquid Spill |
|---|---|---|---|
| RNA Nano | Electrode cleaner with:- RNaseZAP for 60 sec- RNase-free water for 10 sec | Electrode cleaner with RNase-free water for 10 sec | Full pin set cleaning and RNase decontamination with brush [99] |
| RNA Pico & Small RNA | Electrode cleaner with RNase-free water for 5 minutes | Electrode cleaner with RNase-free water for 30 seconds | Full pin set cleaning and RNase decontamination with brush [99] |
Troubleshooting RNA Isolation for Quality Control
RNA isolation is a critical step that directly impacts RIN scores and electropherogram quality. Here are common problems and their solutions:
Problem: Genomic DNA Contamination
- Cause: Traces of genomic DNA always carry through during isolation, especially if homogenization was insufficient or the aqueous phase was disturbed during phenol-based extraction [20].
- Solution: Ensure thorough homogenization to shear genomic DNA. The most effective solution is a DNase treatment. Use a high-activity DNase kit or an on-column DNase digestion step that integrates easily into your workflow [100] [20].
Problem: Degraded RNA / Low Integrity
- Cause: RNase activity during sample collection, storage, or extraction. This can happen if samples are not immediately frozen, or if RNases are introduced during handling [20].
- Solution:
- During storage: Freeze samples immediately in liquid nitrogen or at -80°C. For animal tissues, preserve them in RNALater.
- During extraction: Add beta-mercaptoethanol (BME) to the lysis buffer (e.g., 10 µl of 14.3 M BME per 1 ml of buffer) to inactivate RNases.
- General practice: Always wear gloves, use certified RNase-free consumables and water, and keep samples on ice [20].
Problem: Low RNA Yields
- Cause: Incomplete homogenization (tissue debris left in homogenate), inaccurate tissue weighing/cell counting, or using an elution volume that is too small for silica spin columns [20].
- Solution: Focus on complete homogenization. For silica columns, use the largest elution volume recommended by the manufacturer to maximize RNA recovery from the membrane [20].
Research Reagent Solutions for DNA-Free RNA Prep
This table details key products and their roles in ensuring the isolation of high-quality, DNA-free RNA, which is the foundation for reliable RIN and electropherogram data.
Table 2: Essential Reagents and Kits for RNA Quality Control Workflows
| Product Name | Function & Application | Key Feature |
|---|---|---|
| Total RNA Isolation Mini Kit (Agilent) | Spin-column isolation of total RNA from mammalian cells, tissues, yeast, and bacteria [100]. | Delivers up to a 1,000-fold reduction of genomic DNA without DNase treatment; includes an optional on-column DNase digestion step [100]. |
| Plant RNA Isolation Mini Kit (Agilent) | Isolation of high-purity total RNA from challenging plant tissues (e.g., waxy seeds, polysaccharide-rich tubers) [100]. | Formulated for plants; provides up to a 10,000-fold reduction in genomic DNA contamination; phenol-free [100]. |
| Absolutely Total RNA Purification Kits (Agilent) | DNA-free total RNA and miRNA isolation without the need for additional DNase purchase [101]. | Optimized for various sample sizes and elution volumes (Nano, Micro, Mini, 96-well); includes all necessary reagents [101]. |
| RNA ScreenTape Assay (Agilent) | Automated electrophoretic separation and quality assessment of total RNA on TapeStation systems [98]. | Provides RNA concentration, sizing, and integrity data (RINe) for prokaryotic and eukaryotic samples down to 5 ng/µL [98]. |
| RNaseZAP | RNase decontamination solution for lab surfaces, pipettes, and electrode cartridges [99]. | Critical for maintaining an RNase-free environment to prevent sample and ladder degradation [99]. |
Experimental Workflows and Logical Diagrams
RNA QC and Microarray Analysis Workflow
The following diagram outlines a standard workflow for processing RNA samples for microarray analysis, highlighting the critical quality control checkpoints using the Bioanalyzer.
RNA Degradation Troubleshooting Logic
This troubleshooting guide provides a logical flow to diagnose the source of RNA degradation in Bioanalyzer results.
For researchers working to remove DNA contamination from RNA preparations, determining an acceptable DNA threshold is critical for obtaining accurate, reliable results in downstream applications like RNA sequencing and gene expression analysis.
Frequently Asked Questions: DNA Detection Thresholds
What are common DNA detection limits in RNA-seq? In clinical RNA-seq validation, detection limits are established through rigorous benchmarking. For instance, one validated clinical RNA-seq test for Mendelian disorders establishes reference ranges for each gene and junction based on expression distributions from control data to reliably identify outliers [102].
How does sample type affect DNA detection limits? The sample's microbial biomass significantly impacts detection limits. Low-biomass samples (e.g., certain human tissues, atmosphere) are particularly vulnerable, where contaminant DNA can constitute a large proportion of the signal, pushing detection limits higher. Stringent controls are essential in these contexts [103].
Why is establishing a detection threshold for DNA in RNA preps important? Accurate thresholds prevent false positives in sequencing and expression analysis. Contaminating DNA can be mistakenly sequenced as RNA, leading to incorrect data interpretation. Establishing a threshold ensures the RNA signal is genuine, which is fundamental for valid results in research and diagnostics [103] [102].
What methods can improve the detection of low-abundance targets? For very low-abundance targets, methods may incorporate a pre-amplification step to increase the quantity of target nucleic acids, thereby improving sensitivity and making it easier to activate detection enzymes like Cas13 [104].
Troubleshooting Guide: Contamination Control and Threshold Determination
This guide addresses common issues in achieving and verifying acceptable DNA levels in RNA samples.
| Issue | Possible Cause | Recommended Solution |
|---|---|---|
| High background DNA signal in sequencing data | Contamination from reagents, equipment, or cross-sample leakage [103] | Implement rigorous negative controls (e.g., extraction blanks) and use single-use, DNA-free consumables. Decontaminate surfaces with 80% ethanol followed by a DNA-degrading solution [103]. |
| Inconsistent DNA contamination levels between samples | Variable sample biomass leading to proportional contamination; cross-contamination during handling [103] | Use Personal Protective Equipment (PPE) as a barrier. Process samples from lowest to highest expected biomass. Include multiple control samples to quantify contamination nature and extent [103]. |
| Poor detection sensitivity for low-level DNA | Suboptimal extraction protocol degrading nucleic acids [105] [106] | Optimize lysis protocols with precise temperature control (55°C–72°C) and pH optimization. For tough samples, combine chemical (e.g., CTAB, EDTA) and mechanical homogenization methods strategically [105] [106]. |
| Inability to distinguish signal from noise in low-biomass samples | Lack of appropriate controls and standardized analysis [107] [103] | Follow minimal reporting standards for contamination. Use post-hoc bioinformatic tools to identify and remove contaminants present in negative controls from your sequence datasets [103]. |
Experimental Protocol: Validating Detection Limits for RNA-seq
The following workflow, adapted from clinical RNA-seq validation studies, provides a robust method for establishing DNA detection thresholds in your RNA preparations [108] [102].
Objective: To establish a performance baseline and define detection limits for DNA contamination in an RNA-seq workflow.
Materials:
- Reference Materials: Commercially available reference RNA or well-characterized cell line RNA (e.g., GM24385 lymphoblastoid cell line) [102].
- Nucleic Acid Extraction Kit: A kit validated for high-quality RNA extraction.
- QC Instruments: Qubit fluorometer, TapeStation or Bioanalyzer [108] [109].
- Library Prep & Sequencing: Stranded mRNA library prep kit and compatible sequencer (e.g., Illumina NovaSeq) [108].
- Bioinformatics Tools: Alignment software (e.g., STAR, BWA), and QC tools (e.g., FastQC, Picard) [108].
Procedure:
- Sample Preparation and Control Inclusion:
Library Preparation and Sequencing:
- Prepare sequencing libraries from both the reference RNA and the negative controls using the same standardized protocol [108].
- Sequence all libraries to an appropriate depth (e.g., as determined for your application).
Bioinformatic Analysis and Threshold Determination:
- Alignment and QC: Map sequencing reads to a reference genome (e.g., GRCh38) and collect standard QC metrics [108].
- Establish a Baseline: Analyze the negative control data to identify the background "noise" – any sequences that align to the genome are derived from contamination.
- Define the Threshold: Calculate the proportion of reads in your reference RNA sample that align to intergenic and intronic regions. Compare this to the level of background noise from the negative controls. A practical detection threshold can be set as a statistically significant elevation above this background level [102].
The following diagram illustrates the key steps in this validation workflow:
The Scientist's Toolkit: Essential Reagents and Materials
| Item | Function in Establishing DNA Detection Limits |
|---|---|
| DNA-free Collection Tubes | Prevents introduction of contaminating DNA at the sample collection stage, critical for low-biomass studies [103]. |
| Nucleic Acid Degrading Solution | Used to decontaminate surfaces and equipment, removing trace DNA that could be introduced during sample processing [103]. |
| High-Quality RNA Extraction Kit | Ensures efficient isolation of intact RNA while removing genomic DNA; some protocols include a DNase digestion step [106]. |
| Reference Standard (e.g., GM24385) | Provides a well-characterized benchmark to establish baseline performance and validate the sensitivity of your detection pipeline [102]. |
| Agilent Bioanalyzer/TapeStation | Assesses RNA Integrity Number (RIN), a critical quality metric. Degraded RNA can complicate DNA threshold detection [108] [109]. |
| Specialized Lysis Buffers (e.g., CTAB) | Optimized for breaking down tough tissues (e.g., insect chitin) while preserving nucleic acid integrity, improving yield and purity [106]. |
Disclaimer: This guide synthesizes best practices from recent scientific literature. Always validate protocols and detection thresholds within the specific context of your own laboratory and research application.
FAQs: Addressing DNA Contamination in RNA Preparations
1. What are the primary methods for validating the removal of DNA contamination from RNA samples? The primary methods for validating DNA removal involve various RNA sequencing (RNA-seq) techniques. Key approaches include:
- Targeted RNA-seq: Focuses on specific genes of interest, offering deeper coverage and higher sensitivity for detecting expressed mutations, which can help confirm the absence of DNA-level variants that are not transcribed [110].
- Whole Transcriptome Sequencing (WTS): Provides a comprehensive profile of all expressed genes, which can be used to check for the presence of intergenic or intronic reads that might indicate DNA contamination [110] [111].
- Single-cell RNA-seq (scRNA-seq): While powerful, this method can be confounded by ambient mRNA contamination. Computational tools like
SoupXandCellBenderare essential for correcting this and ensuring accurate downstream analysis, which indirectly validates sample purity [112] [113].
2. How do I choose between targeted and whole transcriptome RNA-seq for validation? The choice depends on your specific needs for sensitivity, cost, and throughput. The table below summarizes the core trade-offs.
| Feature | Targeted RNA-seq | Whole Transcriptome Sequencing (WTS) |
|---|---|---|
| Sensitivity | High for specific, pre-defined targets [110] | Broad, but may miss lowly-expressed variants [110] |
| Cost | Generally lower per sample [111] | Higher |
| Throughput | Suitable for high-throughput screens [111] | Lower throughput |
| Best Use Case | Validating removal of specific DNA variants; high-throughput ecological screening [110] [111] | Discovery-based research; comprehensive purity assessment |
For instance, in ecological toxicology, a targeted "sentinel gene" approach was found to be a cost-effective and high-throughput method for deriving transcriptomic points of departure, achieving goals at a target cost of ≤ $50 per sample [111].
3. What sample size is recommended for a robust RNA-seq experiment to ensure reliable results? Determining the correct sample size is critical for minimizing false positives and maximizing true discoveries. For bulk RNA-seq experiments in model organisms like mice, sample sizes (N) of 6-7 per group are a minimum to reduce the false discovery rate below 50%. However, for more reliable results, a sample size of 8-12 is significantly better at recapitulating the findings of a large, gold-standard experiment [114]. Using only 3-4 replicates, a common practice, leads to highly misleading and irreproducible results [114].
4. How can I troubleshoot high false positive rates in my RNA-seq data after DNA removal? High false positives can stem from several sources:
- Insufficient Sample Size: As noted above, underpowered experiments are a major cause. Increasing your sample size is the most effective strategy [114].
- Ambient RNA Contamination: In single-cell RNA-seq, cell-free mRNA can distort data. Applying correction algorithms like
SoupXorCellBenderis crucial [112] [113]. - Bioinformatic Pipeline Stringency: For targeted RNA-seq, employing a pipeline that uses multiple variant callers (e.g.,
VarDict,Mutect2,LoFreq) and setting stringent thresholds for variant allele frequency (VAF ≥ 2%) and read depth (DP ≥ 20) can help control the false positive rate [110].
Experimental Protocols for Key Validation Methods
Protocol 1: Targeted RNA-seq for Expressed Mutation Detection
This protocol is designed to validate whether DNA variants are actually expressed, thereby confirming successful RNA extraction free of gDNA contamination.
- RNA Sample Preparation: Use RNA extracted from your tissue or cell line of interest. Ensure RNA integrity numbers (RIN) are high (e.g., >8) to guarantee quality.
- Library Preparation: Use a targeted RNA-seq panel (e.g., Agilent Clear-seq or Roche Comprehensive Cancer panels) that includes probes designed for your genes of interest. These panels often contain exon-exon junction probes to specifically capture spliced RNA [110].
- Sequencing: Perform next-generation sequencing on an Illumina or comparable platform.
- Bioinformatic Analysis:
- Alignment: Map sequencing reads to the reference genome using a splice-aware aligner (e.g., STAR).
- Variant Calling: Use a consensus approach from multiple callers such as
VarDict,Mutect2, andLoFreqintegrated via a pipeline likeSomaticSeq[110]. - Filtering: Apply initial filters for a variant allele frequency (VAF) ≥ 2%, total read depth (DP) ≥ 20, and alternative allele depth (ADP) ≥ 2. Adjust filters based on a known negative set to control the false positive rate [110].
- Interpretation: Compare the variants detected in the targeted RNA-seq data to your DNA-seq data. Expressed variants found in both confirm biological relevance; variants found only in DNA-seq may represent residual DNA contamination or non-expressed alleles [110].
Protocol 2: Ambient mRNA Correction in scRNA-seq Data
This protocol corrects for ambient RNA, a common contaminant in single-cell workflows.
- Data Pre-processing:
- Ambient mRNA Correction:
- Using SoupX: Input the raw and filtered gene-barcode matrices. Provide a curated set of genes that are not typically expressed in your cell type (e.g., immunoglobulin genes for T-cells, hemoglobin genes for non-erythroid cells) to improve contamination fraction estimation. Use the
autoEstContfunction with parameterstfidfMin = 0.01,soupQuantile = 0.8[112] [113]. - Using CellBender: Input the raw gene-barcode matrix and run with default settings for automated estimation and removal of ambient RNA [112] [113].
- Using SoupX: Input the raw and filtered gene-barcode matrices. Provide a curated set of genes that are not typically expressed in your cell type (e.g., immunoglobulin genes for T-cells, hemoglobin genes for non-erythroid cells) to improve contamination fraction estimation. Use the
- Downstream Analysis: Proceed with data integration, normalization, clustering, and differential expression analysis on the corrected count matrix.
Workflow Visualization
The following diagram illustrates the logical workflow for selecting an appropriate validation method based on experimental goals.
The Scientist's Toolkit: Research Reagent Solutions
The following table details key reagents and tools essential for experiments focused on removing and validating DNA contamination in RNA preparations.
| Item Name | Function/Brief Explanation |
|---|---|
| Targeted RNA-seq Panels (e.g., Agilent Clear-seq, Roche ROCR) | Designed with probes for specific genes or transcripts. They provide deep coverage to detect low-abundance expressed variants, helping distinguish true RNA signals from DNA contamination [110]. |
| Sentinel Gene Sets (e.g., TempO-Seq S1500+) | A targeted panel of representative genes. It enables high-throughput, cost-effective ecological transcriptomics screening and can be used to derive transcriptomic points of departure [111]. |
| Computational Correction Tools (e.g., SoupX, CellBender) | Software packages that estimate and remove the effects of ambient mRNA contamination from single-cell RNA-seq data, crucial for ensuring accurate differential expression analysis [112] [113]. |
| Metabolic Labeling Reagents (e.g., 4-Thiouridine (4sU)) | Nucleoside analogs incorporated into newly synthesized RNA. They allow for time-resolved measurement of RNA dynamics and can help distinguish newly transcribed RNA from pre-existing or contaminating pools [115]. |
| RNA Integrity Biosensor | A tool using a colorimetric output for rapid, cost-effective quality control of RNA, assessing integrity without the need for specialized equipment like LC-MS [116]. |
Conclusion
The complete removal of genomic DNA contamination is not an optional refinement but a fundamental prerequisite for generating reliable gene expression data. As this guide has detailed, a successful strategy requires a holistic approach: understanding the sources of contamination, applying a robust and well-optimized removal method like effective DNase treatment, and, crucially, implementing sensitive validation techniques such as rDNA-based qPCR to confirm success. For the future of biomedical research, particularly in clinical diagnostics and drug development where lncRNAs like MALAT1 are emerging as key biomarkers, upholding these rigorous standards is paramount. Adopting these best practices will minimize false discoveries, enhance data reproducibility, and ensure that conclusions about transcript abundance are based on RNA signals alone, thereby strengthening the foundation of translational science.
References
- 1. DNase Treatment & Removal Reagents | Thermo Fisher Scientific - US [https://www.thermofisher.com/us/en/home/references/ambion-tech-support/rna-isolation/tech-notes/a-new-method-to-remove-dna.html]
- 2. Comparison of different methods for DNA-free RNA isolation ... [https://pmc.ncbi.nlm.nih.gov/articles/PMC3050700/]
- 3. DNase Treatment in RNA Extraction: Essential or Optional? [https://www.lexogen.com/blog/rna-lexicon-dnase-to-treat-or-not-to-treat/]
- 4. How should I purify my samples? How should I remove DNA ... [https://dnatech.ucdavis.edu/faqs/how-should-i-purify-my-samples-how-should-i-remove-dna-or-rna-contamination]
- 5. and reverse transcription RNA isolation [https://www.abcam.com/en-us/technical-resources/protocols/rna-isolation-and-reverse-transcription]
- 6. RNA Sample Collection, Protection, and Isolation Support ... [https://www.thermofisher.com/us/en/home/technical-resources/technical-reference-library/nucleic-acid-purification-analysis-support-center/rna-sample-collection-protection-isolation-support/rna-sample-collection-protection-isolation-support-troubleshooting.html]
- 7. Troubleshooting RNA-seq data with DNA contamination [https://www.biostars.org/p/9585445/]
- 8. Extrachromosomal circular DNA: biogenesis, structure, ... [https://www.nature.com/articles/s41392-022-01176-8]
- 9. Unveiling the mysteries of extrachromosomal circular DNA [https://molecular-cancer.biomedcentral.com/articles/10.1186/s12943-024-02187-5]
- 10. How can I avoid or remove genomic DNA contamination ... [https://www.qiagen.com/us/resources/faq/2662]
- 11. Molecular mechanisms of extrachromosomal circular DNA ... [https://pmc.ncbi.nlm.nih.gov/articles/PMC11879418/]
- 12. The Effect of Genomic DNA Contamination on ... [https://www.mdpi.com/2075-4418/11/7/1160]
- 13. Evaluation of Different Cleaning Strategies for Removal ... [https://pmc.ncbi.nlm.nih.gov/articles/PMC8775027/]
- 14. Decrease DNA contamination in the laboratories [https://www.sciencedirect.com/science/article/abs/pii/S187517681730269X]
- 15. Avoiding Contamination | Thermo Fisher Scientific - ES [https://www.thermofisher.com/us/en/home/life-science/pcr/real-time-pcr/real-time-pcr-learning-center/real-time-pcr-basics/good-laboratory-practice-avoid-contamination-qpcr-experiments.html]
- 16. The Effect of Genomic DNA Contamination on ... [https://pubmed.ncbi.nlm.nih.gov/34202021/]
- 17. Genes expressed at low levels raise false discovery rates in ... [https://bmcgenomics.biomedcentral.com/articles/10.1186/s12864-022-08785-1]
- 18. CleanUpRNAseq: An R/Bioconductor Package for ... [https://pmc.ncbi.nlm.nih.gov/articles/PMC11348166/]
- 19. Tips for RNA Extraction Troubleshooting [https://www.mpbio.com/us/tips-for-rna-extraction-troubleshooting?srsltid=AfmBOop0YE8GGjZqTAxpXoLVK_yj90qW07l9Z2yTy-y9JywBA2rQZYj7]
- 20. Troubleshooting RNA Isolation [https://bitesizebio.com/2345/troubleshooting-rna-isolation/]
- 21. Consistent RNA sequencing contamination in GTEx and ... [https://www.nature.com/articles/s41467-020-15821-9]
- 22. Troubleshooting Guide for RNA Cleanup [https://www.neb.com/en-us/tools-and-resources/troubleshooting-guides/troubleshooting-guide-for-rna-cleanup?srsltid=AfmBOoqnS6cX6r8-7cpeNUv2KBGgVZmID4IOllMm3MWSSTFJGrsqaORe]
- 23. Ex-Ex Primer: An experimentally validated tool for ... [https://www.sciencedirect.com/science/article/abs/pii/S0168165621002777]
- 24. RNA Isolation for qRT-PCR [https://www.thermofisher.com/us/en/home/references/ambion-tech-support/rtpcr-analysis/general-articles/rna-isolation-for-qrt-pcr.html]
- 25. Reduction of DNA Contamination in RNA Samples for RT- ... [https://pmc.ncbi.nlm.nih.gov/articles/PMC5476456/]
- 26. ExonSurfer: a web-tool to design primers at exon ... [https://pmc.ncbi.nlm.nih.gov/articles/PMC11170769/]
- 27. ExonSurfer: a web-tool to design primers at exon–exon junctions [https://bmcgenomics.biomedcentral.com/articles/10.1186/s12864-024-10456-2]
- 28. Primer designing tool - NCBI - NIH [https://www.ncbi.nlm.nih.gov/tools/primer-blast/]
- 29. How to design qPCR primers that span an exon junction |IDT [https://www.idtdna.com/page/support-and-education/decoded-plus/how-to-design-qpcr-primers-that-span-an-exon-junction/]
- 30. Top Ten Pitfalls in Quantitative Real-time PCR Primer ... [https://www.thermofisher.com/us/en/home/references/ambion-tech-support/rtpcr-analysis/general-articles/top-ten-pitfalls-in-quantitative-real-time-pcr-primer.html]
- 31. DNase I, Amplification Grade - FAQs [https://www.thermofisher.com/store/v3/products/faqs/18068015]
- 32. DNase, a powerful research tool for DNA manipulations [https://www.thermofisher.com/us/en/home/references/ambion-tech-support/nuclease-enzymes/general-articles/dnase-i-demystified.html]
- 33. DNAse I qualification and sample treatment [https://www.moleculardevices.com/en/assets/app-note/reagents/dna-dnase-i-qualification-and-sample-treatment]
- 34. Removing DNA Contamination from RNA Samples by ... [https://www.semanticscholar.org/paper/Removing-DNA-Contamination-from-RNA-Samples-by-with-Green-Sambrook/226ff2c86d108d05403b63ac631a5b16ef00c1ee]
- 35. RNaseAlert procedure | Is Your DNase RNase-Free [https://www.thermofisher.com/us/en/home/references/ambion-tech-support/nuclease-enzymes/general-articles/is-your-dnase-rnase-free.html]
- 36. resDetect™ DNase Activity Assay Kit (Fluorescence) [https://www.acrobiosystems.com/products/kits/dnase-i-bovine-ase-a002?srsltid=AfmBOoqiRz_N3rY5YpMPVlz0x1PDV_MblevhceXIebdBqzc5EaDIVHwo]
- 37. Rapid DNA and RNA isolation from few or single cells ... [https://www.nature.com/articles/s41598-025-05770-y]
- 38. Assessment of DNase Activity by Ratiometric Fluorescence ... [https://pubmed.ncbi.nlm.nih.gov/40788859/]
- 39. An Innovative High-Throughput Genome Releaser for ... [https://www.frontiersin.org/journals/bioengineering-and-biotechnology/articles/10.3389/fbioe.2025.1547909/abstract]
- 40. The Effect of Genomic DNA Contamination on ... [https://pmc.ncbi.nlm.nih.gov/articles/PMC8305527/]
- 41. Methods for removing DNA contamination from RNA samples [https://www.biosyn.com/tew/Methods-for-removing-DNA-contamination-from-RNA-samples.aspx]
- 42. Troubleshooting Guide for RNA Cleanup [https://www.neb.com/en-us/tools-and-resources/troubleshooting-guides/troubleshooting-guide-for-rna-cleanup?srsltid=AfmBOorUKY-BcZ1IBiBTWcLvdJGmHAqij01n9PnlNbk6_nVt-w753Zft]
- 43. RNA-Seq samples can be contaminated with DNA [https://sequencing.qcfail.com/articles/rna-seq-samples-can-be-contaminated-with-dna/]
- 44. Standardizing high-throughput RNA extraction [https://pubmed.ncbi.nlm.nih.gov/40581191/]
- 45. An inhibitor-free, versatile, fast, and cheap precipitation-based ... [https://journals.plos.org/plosone/article?id=10.1371/journal.pone.0317658]
- 46. DNA/RNA-ExitusPlus™ [https://www.itwreagents.com/united-states/en/product/dnarna-exitusplus-/A7089]
- 47. Troubleshooting Guide for RNA Cleanup [https://www.neb.com/en-us/tools-and-resources/troubleshooting-guides/troubleshooting-guide-for-rna-cleanup?srsltid=AfmBOorFVX-ZeUVm0xNBoyBc1n7prTuKt8k8VoZl6eVLUPAUhse-rD-T]
- 48. Validation of RNA Extraction Methods and Suitable ... [https://pmc.ncbi.nlm.nih.gov/articles/PMC10932218/]
- 49. Evaluation of automatic cell free DNA extraction metrics ... [https://www.nature.com/articles/s41598-025-03508-4]
- 50. DNA Purification | DNA Extraction Methods [https://www.promega.com/resources/guides/nucleic-acid-analysis/dna-purification/]
- 51. Comparative Analysis of rRNA Removal Methods for RNA- ... [https://www.mdpi.com/2218-273X/12/5/682]
- 52. RNeasy Universal Kits – RNA Extraction for All Tissue Types [https://www.qiagen.com/us/products/discovery-and-translational-research/dna-rna-purification/rna-purification/total-rna/rneasy-universal-kits]
- 53. Comparison of RNA extraction kits and histological stains ... [https://pmc.ncbi.nlm.nih.gov/articles/PMC4705748/]
- 54. Quality Makes a Difference in RNA Prep [https://www.genengnews.com/topics/drug-discovery/quality-makes-a-difference-in-rna-prep/]
- 55. Troubleshooting Guide: RNA Extraction for Sequencing [https://rna.cd-genomics.com/resource/troubleshooting-rna-extraction.html]
- 56. Troubleshooting Guide for RNA Cleanup [https://www.neb.com/en-us/tools-and-resources/troubleshooting-guides/troubleshooting-guide-for-rna-cleanup?srsltid=AfmBOoqlk1gCE6vaTzA4_438I-0GssTppb3BqwjnM6J3eCVG5P1-Vh_q]
- 57. Transparent DNA/RNA Co-extraction Workflow Protocol ... [https://www.frontiersin.org/journals/microbiology/articles/10.3389/fmicb.2016.01588/full]
- 58. Sample Prep for Single Cell/Nuclei RNA-seq [https://biotech.wisc.edu/sample-prep-for-single-cell-nuclei-rna-seq/]
- 59. RNA isolation: Methods, challenges, and applications [https://www.qiagen.com/us/knowledge-and-support/knowledge-hub/bench-guide/rna/rna-purification/rna-isolation-sample-source-considerations]
- 60. Introducing synthetic thermostable RNase inhibitors to ... [https://www.nature.com/articles/s41467-024-52717-4]
- 61. The Basics: RNase Control [https://www.thermofisher.com/us/en/home/references/ambion-tech-support/nuclease-enzymes/general-articles/the-basics-rnase-control.html]
- 62. RNA Purification [https://www.promega.com/resources/guides/nucleic-acid-analysis/rna-purification-guide/]
- 63. Deciphering the impact of contaminating microbiota in DNA ... [https://pmc.ncbi.nlm.nih.gov/articles/PMC12502690/]
- 64. Living with RNase: Sources & Contamination Control [https://www.thermofisher.com/us/en/home/references/ambion-tech-support/nuclease-enzymes/general-articles/ten-sources-of-rnase-contamination.html]
- 65. Precautions for Handling of RNA [https://lifescience.roche.com/global/en/article-listing/article/precautions-for-handling-of-rna.html]
- 66. Optimization of Dnase I removal of contaminating DNA from ... [https://pubmed.ncbi.nlm.nih.gov/8780872/]
- 67. Troubleshooting Guide for RNA Cleanup [https://www.neb.com/en-us/tools-and-resources/troubleshooting-guides/troubleshooting-guide-for-rna-cleanup?srsltid=AfmBOorGZN_HYEaslC5HRkKw9ztctvg05WoqNh0-C0x3MdMwQsfL6F1J]
- 68. Plant RNA Extraction: Challenges, Methods, and Tips to ... [https://www.lexogen.com/blog/challenges-in-plant-transcriptomics-rna-extraction-and-how-to-improve-it/]
- 69. Troubleshooting Guide for RNA Cleanup [https://www.neb.com/en/tools-and-resources/troubleshooting-guides/troubleshooting-guide-for-rna-cleanup?srsltid=AfmBOorFtN0Epf-0ENn1jMb7Q6sxaawDVqeNFvPGn9Oe_x5AqHjH-8QK]
- 70. Tips & Tricks For RNA Isolation [https://www.zymoresearch.com/blogs/blog/tips-tricks-for-rna-isolation?srsltid=AfmBOooGyhPf94XVAYaxYRCmQeZJsXXuDltuRtKEerub4anFK-eqtIUU]
- 71. Blog/How to Reduce Chances of Lab Contamination During ... [https://www.medtl.net/news/blog/how-to-reduce-chances-of-lab-contamination-during-dna-and-rna-extraction.html]
- 72. Troubleshooting Guide for Total RNA Extraction & Purification [https://www.neb.com/en-us/tools-and-resources/troubleshooting-guides/troubleshooting-guide-for-total-rna-extraction-and-purification?srsltid=AfmBOopoXYeh279op9cPqWOfN4ADeb0KZ6D2kGJyFeJZz6sJZj4UyCOi]
- 73. Troubleshooting Guide for RNA Cleanup [https://www.neb.com/en-us/tools-and-resources/troubleshooting-guides/troubleshooting-guide-for-rna-cleanup?srsltid=AfmBOopyS6Q3HgFOKsVrsC5uFCqXm6vz2CKg8TCcBOFGHASu2KMQs5d1]
- 74. RNA preservation in human dental pulp for transcriptomic ... [https://pmc.ncbi.nlm.nih.gov/articles/PMC12592039/]
- 75. RNA Preservation Methods to Improve RNA Quality and ... [https://alitheagenomics.com/blog/rna-preservation-methods-to-improve-rna-quality-and-quantity]
- 76. Mastering RNA-Seq: The importance of DNA depletion ... [https://www.linkedin.com/pulse/mastering-rna-seq-importance-dna-depletion-accurate-rna-sequencing-kx0ne]
- 77. Bias in RNA-seq Library Preparation: Current Challenges ... [https://pmc.ncbi.nlm.nih.gov/articles/PMC8079181/]
- 78. What negative controls are typically included in qPCR and/ ... [https://www.qiagen.com/us/resources/faq/2672]
- 79. Could your PCR be affected by contamination? | IDT [https://www.idtdna.com/page/support-and-education/decoded-plus/could-your-pcr-be-affected-by-contamination/]
- 80. Correction of RT–qPCR data for genomic DNA-derived ... [https://pmc.ncbi.nlm.nih.gov/articles/PMC3326333/]
- 81. Basic Principles of RT-qPCR [https://www.thermofisher.com/us/en/home/brands/thermo-scientific/molecular-biology/molecular-biology-learning-center/molecular-biology-resource-library/spotlight-articles/basic-principles-rt-qpcr.html]
- 82. Real-Time PCR Basics Support—Troubleshooting [https://www.thermofisher.com/us/en/home/technical-resources/technical-reference-library/real-time-digital-PCR-applications-support-center/real-time-pcr-basics-support/real-time-pcr-basics-support-troubleshooting.html]
- 83. Assessment of DNA Contamination in RNA Samples ... [https://pmc.ncbi.nlm.nih.gov/articles/PMC5908672/]
- 84. Development and validation of universal PCR, basic ERA ... [https://www.sciencedirect.com/science/article/abs/pii/S0882401025003948]
- 85. Development of a rapid, culture-free, universal microbial ... [https://pmc.ncbi.nlm.nih.gov/articles/PMC12306622/]
- 86. Contamination and Sensitivity Issues with a Real-Time ... [https://pmc.ncbi.nlm.nih.gov/articles/PMC86577/]
- 87. Luna® One-Step RT-qPCR Troubleshooting Guide [https://www.neb.com/en-us/tools-and-resources/troubleshooting-guides/luna-one-step-rt-qpcr-troubleshooting-guide?srsltid=AfmBOoqhHvLcmy9Ct8HYpNlCNuoBnHK_p5eHZ5Xvxpo2xAVVn1_GbFIw]
- 88. Troubleshooting qPCR: Interpreting Amplification Curves [https://blog.biosearchtech.com/thebiosearchtechblog/bid/63622/qpcr-troubleshooting]
- 89. RNA Isolation for RT-PCR [https://www.thermofisher.com/us/en/home/references/ambion-tech-support/rna-isolation/tech-notes/rna-isolation-for-rt-pcr.html]
- 90. Rapid and reliable species-level identification from clinical ... [https://www.nature.com/articles/s41598-025-14071-3]
- 91. RNA quantification and quality control methods [https://www.qiagen.com/us/knowledge-and-support/knowledge-hub/bench-guide/rna/rna-analysis/quantification-and-analysis-of-rna]
- 92. RNA quality control: 3 Key Considerations [https://bitesizebio.com/13527/how-to-quality-control-check-your-rna-samples/]
- 93. Troubleshooting Guide for Total RNA Extraction & Purification [https://www.neb.com/en-us/tools-and-resources/troubleshooting-guides/troubleshooting-guide-for-total-rna-extraction-and-purification?srsltid=AfmBOopkzG2RIg0jvRIm82_nQ-0FSkaKfsg_lG4ENhMEEqoBNqeOfAVH]
- 94. Analysis of RNA Yield, Integrity, and Purity [https://www.biopharminternational.com/view/validating-rna-quantity-and-quality-analysis-rna-yield-integrity-and-purity]
- 95. An accurate DNA and RNA based targeted sequencing ... [https://www.nature.com/articles/s41598-025-91640-6]
- 96. The suitability of using spectrophotometry to determine ... [https://www.sciencedirect.com/science/article/abs/pii/S0889157522003076]
- 97. Use of bioanalyzer electropherograms for quality control and ... [https://pmc.ncbi.nlm.nih.gov/articles/PMC2816811/]
- 98. RNA ScreenTape Analysis - TapeStation Systems [https://www.agilent.com/en/product/automated-electrophoresis/tapestation-systems/tapestation-rna-screentape-reagents/rna-screentape-analysis-228268?srsltid=AfmBOoretrEVXQcBrTL541wiyeoeKXhDAqc2JLLCwOyYrdhEzwYlNTWH]
- 99. Troubleshooting Degraded Bioanalyzer RNA Ladder or ... [https://community.agilent.com/knowledge/automated-electrophoresis-portal/kmp/automated-electrophoresis-articles/kp1258.troubleshooting-degraded-bioanalyzer-rna-ladder-or-samples]
- 100. RNA Isolation Kits - Details & Specifications [https://www.agilent.com/en/rna-isolation-kits-details-specifications?srsltid=AfmBOooO_X498wKC1ga_okR5ArBWcbrKpiXTrNVHy0HbBjEptKG7X6UB]
- 101. Absolutely Total RNA Purification Kits [https://www.agilent.com/en/product/real-time-pcr-%28qpcr%29/real-time-pcr-%28qpcr%29-nucleic-acid-purification-isolation-kits/rna/absolutely-total-rna-purification-kits-232739?srsltid=AfmBOor91s7U1P7WnNAD8ZOdtIoYnE671p-1FasG2WlPmyfi7vi2XYCv]
- 102. Article Clinical validation of RNA sequencing for Mendelian ... [https://www.sciencedirect.com/science/article/pii/S0002929725000527]
- 103. Guidelines for preventing and reporting contamination in ... [https://www.nature.com/articles/s41564-025-02035-2]
- 104. CRISPR–Cas based platforms for RNA detection [https://pubs.rsc.org/en/content/articlehtml/2025/cc/d5cc03257a?page=search]
- 105. How to Work with Challenging or Limited Genomic ... [https://blog.omni-inc.com/blog/how-to-work-with-challenging-or-limited-genomic-samples-updated-for-2025]
- 106. Optimization of genomic DNA and total RNA extraction ... [https://bmcmethods.biomedcentral.com/articles/10.1186/s44330-025-00038-3]
- 107. Airborne DNA: State of the art – Established methods and ... [https://www.sciencedirect.com/science/article/pii/S004896972407596X]
- 108. Clinical and analytical validation of a combined RNA ... [https://www.nature.com/articles/s43856-025-00934-3]
- 109. Evaluation of Long-Read RNA Sequencing Procedures for ... [https://pmc.ncbi.nlm.nih.gov/articles/PMC12469794/]
- 110. Augmenting precision medicine via targeted RNA-Seq ... [https://www.nature.com/articles/s41698-025-00993-8]
- 111. Comparison of whole transcriptome and targeted RNA ... [https://www.sciencedirect.com/science/article/abs/pii/S027323002500128X]
- 112. Understanding and mitigating the impact of ambient mRNA ... [https://pmc.ncbi.nlm.nih.gov/articles/PMC12459771/]
- 113. Understanding and mitigating the impact of ambient mRNA ... [https://journals.plos.org/plosone/article?id=10.1371/journal.pone.0332440]
- 114. Optimized murine sample sizes for RNA sequencing ... [https://www.nature.com/articles/s41467-025-65022-5]
- 115. Benchmarking metabolic RNA labeling techniques for high ... [https://pmc.ncbi.nlm.nih.gov/articles/PMC12215390/]
- 116. Enhancing the performance of an in vitro RNA biosensor ... [https://pubmed.ncbi.nlm.nih.gov/40071731/]